THE 10 ESSENTIALS FOR ANY OUTDOOR ADVENTURE
Safety should be top of mind any time you head outside, whether you’re hiking, biking, backpacking, camping, or kayaking. One of the best ways to stay safe in the backcountry is to always carry the 10 Essentials with you.
The idea of the 10 Essentials originated with The Mountaineers, a Seattle-based outdoors group, nearly a century ago. Today, the list is still very much the same but now focuses on the essential “systems” one should always have with them rather than a specific list of items to carry. You can find more in the book Mountaineering: The Freedom of the Hills.
This post may include affiliate links. As an Amazon Associate I earn from qualifying purchases. Find more info in my privacy policy.
I really love this systems approach as it is less rigid than a list of items, it allows individuals to tailor their kit to the activity and environment more effectively, and it makes you more aware of risks and the ways in which you are planning to mitigate those.
Every outdoor activity, no matter how seemingly safe, carries some risk. We carry the 10 Essentials to better deal with extreme and unexpected situations that may arise and to take responsibility for ourselves in the backcountry.
Below, you’ll find a quick overview of each system, some examples of items you’ll want to carry, what I have in my pack, and tips for making the most of your 10 Essentials.
NAVIGATION AND COMMUNICATION
Getting lost is one of the biggest risks we take when we head out into the backcountry. Carrying tools for navigation will help to keep us on track (or get us back on it if we veer off). Keep in mind that electronic tools can fail and batteries die. If you’re using apps, make sure you download anything you might need before you’re out of service.
You’ll often see 10 Essentials lists that have added communication as a sort of 11th essential. I’ve chosen to include it here with navigation, since a lot of the communication tools available double as navigation aids – such as your phone or a GPS with satellite communication abilities. In addition to electronics, you’ll want to have ways to send visual and noise signals for cases where you don’t have service or your batteries are dead.
Navigation and Communication Options:
- Topographic map (in waterproof case)
- Guidebook or trail description
- Compass
- GPS
- Altimeter
- Phone with apps (ex: Gaia GPS)
- Satellite messaging device
- Non-electronic signalling devices (mirror, whistle, bright coloured items)
What I carry: I like to carry paper maps and a trail description whenever possible. I also usually have a GPS with me. When I’m out with the dogs, I use the handheld on their GPS collar system. We also have a Garmin Montana 700 for more remote and longer adventures.
As for communication, I always have my phone with me but don’t rely on it much as I’m usually outside of service. I carry a whistle and make sure to have bright-coloured items (jacket, dry bags, orange emergency bivy, etc.) that I can use to signal. Sharing my trip plans with a trusted person back home before I head out is also an important part of the communication factor.
SHOP NAVIGATION GEAR: REI | MEC
NUTRITION
Beyond the normal meals or snacks you might take, you should always pack a little extra in case you get stuck out longer than expected. The general rule is to pack an extra day’s worth of food than what you expect to need.
Aim for calorie-dense, easy to pack options. Remember that you’re going for survival and not for gourmet. Shelf-stable, no water and no cooking required options are the best bet for a true survival situation where you may not easily have the means to cook or the option to use a large amount of water.
Nutrition Options:
- High-calorie energy bars
- Energy gels
- Dehydrated meals
What I carry: I find high-energy bars (such as Probars and Cliff Bars) to be the easiest thing to throw in for a backup food source. I also usually pack dehydrated meals for a more filling meal if I’ll have my stove with me (Mountain House Lasagna is still my fave).
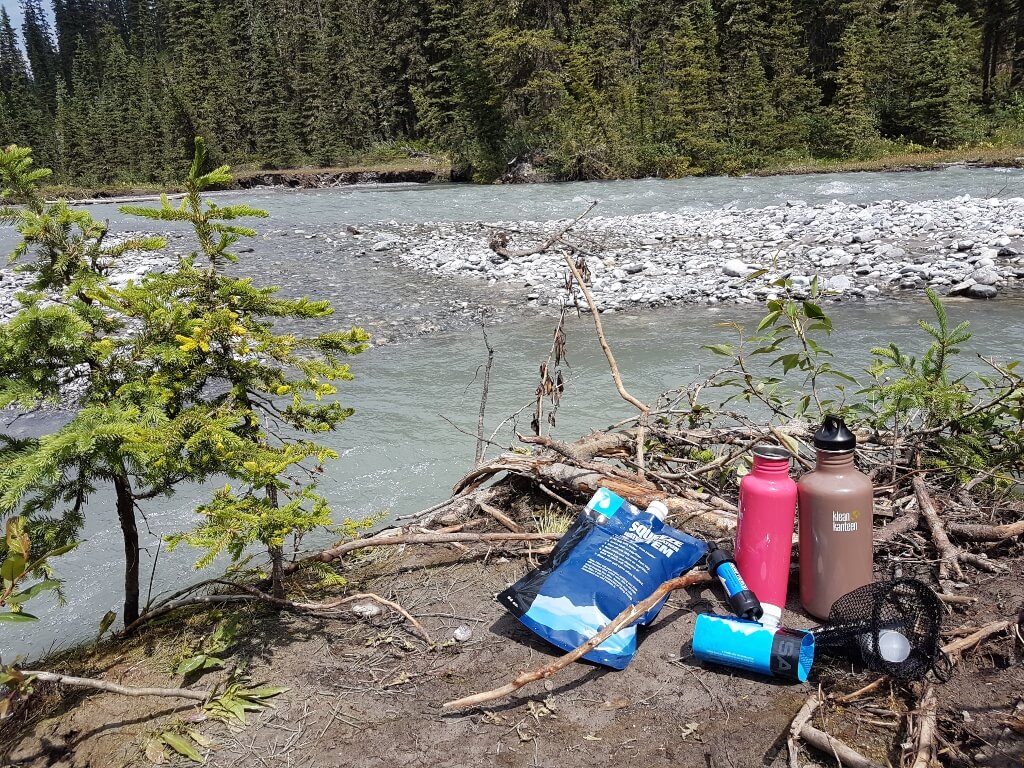
HYDRATION
As with food, you’ll want to carry additional water beyond what you think you’ll need. Recommendations for how much water to carry vary widely and will depend heavily on the type of activity, environment and the individual. 1 litre per person, per hour is a good rule of thumb to follow.
For shorter outings, you may be able to simply carry extra water. For longer outings, carrying filtration and purification items will ensure you can access safe drinking water from local sources.
Hydration Options:
- Water bottle or bladder that has the capacity of 1-2L of additional water
- Water filter
- Steripen
- Lifestraw
- Purification tablets or drops
What I carry: I carry roughly 3L of water between my bladder and water bottle. In addition to that, I like to pack my Sawyer Mini and a box of Aquatabs for backup.
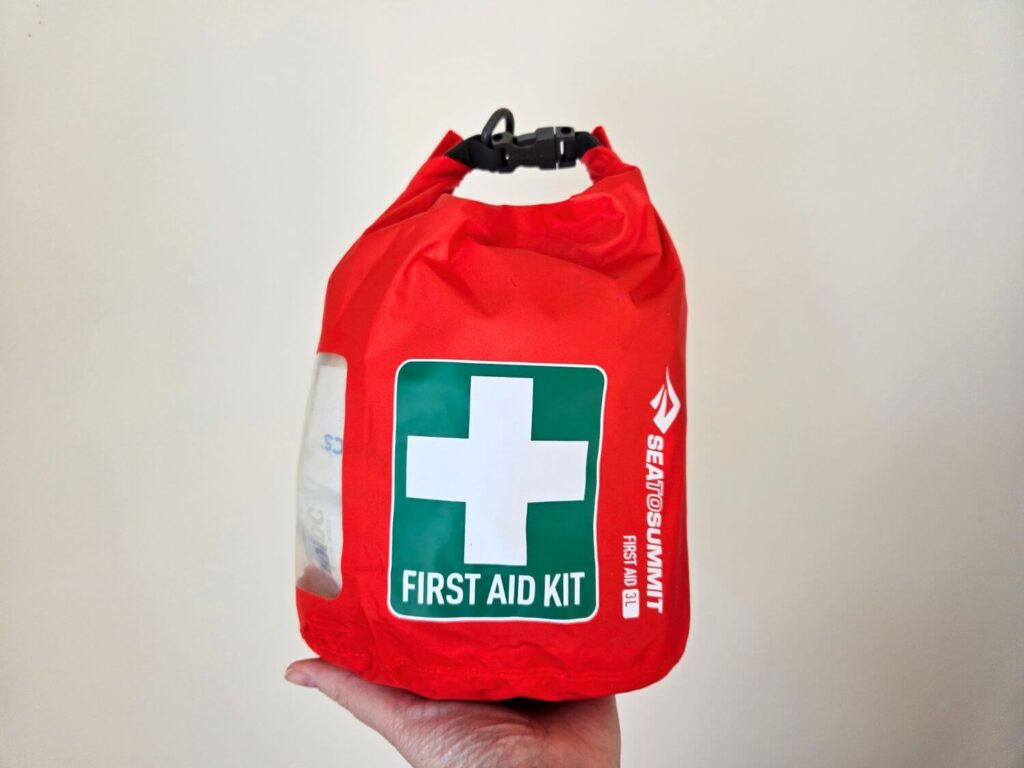
FIRST AID KIT
I think it’s a given that you should always carry a first aid kit in the backcountry. The important part is the contents of the first aid kit and ensuring you know what’s in it, how to use it, and continually taking inventory to replace expired or used items.
If you purchase a pre-made kit, you’ll likely want to add some items that don’t commonly come in those kits such as medications, blister care, scissors, etc. You may also want to adjust your first aid kit based on the activity you’re doing and the risk level.
First Aid Kit Items:
- Commercial first aid kit (Adventure Medical Kits are what I recommend if going this route)
- DIY homemade first aid kit
- Personal medications
- Painkillers
- Foot and blister care
- Duct tape
What I carry: For years, I always carried an Adventure Medical Kits first aid kit. I now carry a self-made first aid kit that is tailored to our needs. The size and contents vary depending on the season and activity we’re doing. For a complete list of what I carry, see my article: DIY First Aid Kit for Outdoor Adventures.
SHOP FIRST AID GEAR: REI | MEC
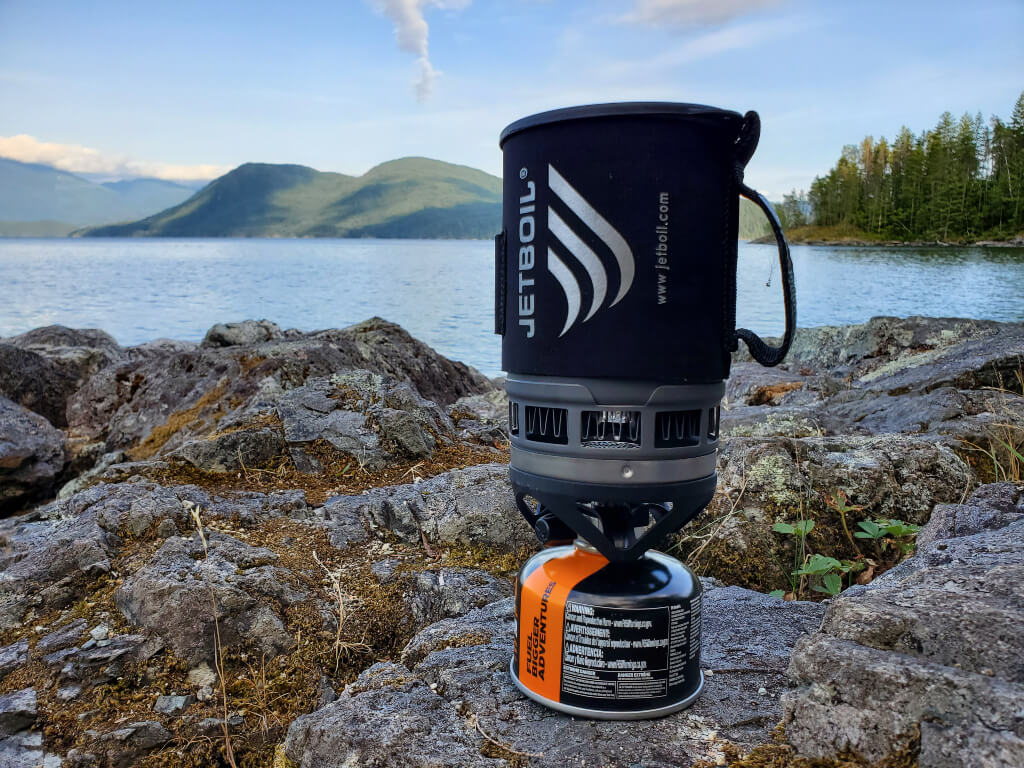
FIRE
A source of fire could be the difference between life and death if you’re stuck in the backcountry for an extended period of time in cold or wet weather. Having the means to start a fire is crucial.
Fire Options:
- Lighter
- Waterproof Matches
- Fire starter/tinder (homemade or commercial)
- Stove with plenty of fuel
- Knife and flint
What I carry: I always have a lighter, stormproof matches, knife, flint, and fire starter in my kit. I also carry a Jetboil Zip with plenty of fuel on longer trips or in cold weather.
INSULATION
In addition to fire, insulation will be your other defense against hypothermia, exposure, and cold. Even if the weather looks great and feels warm, always carry extra layers for unexpected temperature changes (especially if you are gaining any type of elevation) or if you need to spend the night out in the backcountry.
Insulation Options:
- Rain gear
- Fleece layer
- Insulated jacket
- Toque (or beanie for you non-Canadians)
- Buff
- Mitts
- Extra socks
What I carry: Depending on the activity, my extra layers usually include my rain gear, insulated jacket, lightweight fleece, toque, mitts, and wool socks. I also almost always wear a buff while I’m out and about.
ILLUMINATION
Getting stuck out after dark without a source of light quickly makes for a difficult, dangerous, and scary situation. Even if you have intentions of being back well before sunset, always throw a source of light in your bag.
I don’t recommend relying on your phone’s flashlight as a source of light because it quickly drains the battery and will leave you without light or a way to call for help once you’re back in service.
Illumination Options:
- Headlamp
- Flashlight
- Extra batteries or battery banks/cables for rechargeables
What I carry: I have BioLite 330 and 750 rechargeable headlamps. I always make sure to fully charge them before we head out and carry their Charge 40 battery packs (also fully charged prior) to recharge on the go if we need.
I much prefer headlamps to flashlights as they provide hands-free use if you’re dealing with any kind of injury or emergency situation where fumbling with a flashlight might be problematic.
SHOP ILLUMINATION GEAR: REI | MEC
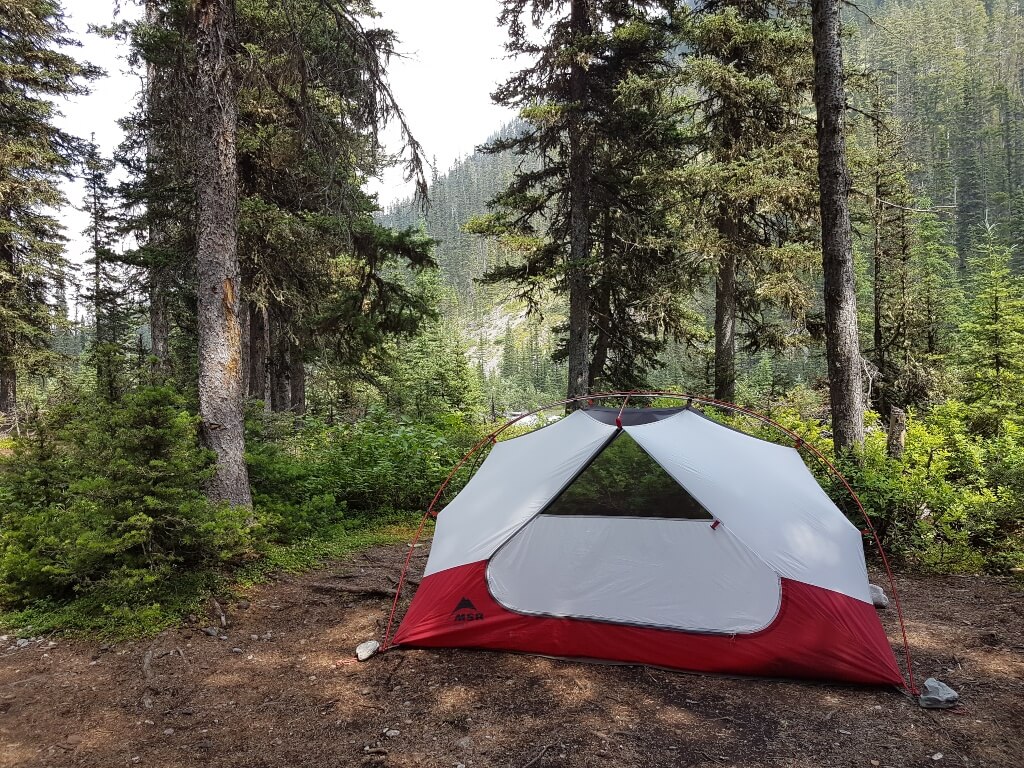
SHELTER
If you’re out on a multi-day trip, you’ll already have a shelter of some sort packed. But if you are heading out on a day hike, you’ll want to throw a lightweight emergency shelter in your bag to use in case you get stuck out for the night or need to seek shelter from a storm.
Even for longer trips when you have a tent packed, a quick emergency shelter option is not a bad thing to have on hand for extreme situations where setting up a tent may not be an option.
Shelter Options:
- Garbage bag (bonus points if it’s orange and can be used to signal for help)
- Tarp and rope
- Emergency blanket or bivy
What I carry: I have both emergency blankets and bivy sacks which I pack on every trip. They are lightweight and take up hardly any space in my bag so there’s really no reason not to take them along.
REPAIR KIT/TOOLS
A small tool and repair kit will go a long way to making your life easier in an emergency or survival situation. Making fire, building shelter, and dealing with injuries can be made a lot simpler with tools.
Tools Options:
- Multitool (with knife, pliers, and screwdriver)
- Folding saw
- Duct tape
- Scissors
- Any specialty repair items specific to your gear
What I carry: I carry a small multitool and I have scissors and duct tape in my first aid kit at all times. I also have an extra folding knife in my fire-starting kit with my flint. We do have a small folding saw but we typically only carry that on longer trips.
SUN PROTECTION
Sun exposure is something that a lot of us don’t immediately think of when considering threats and risks in the outdoors. But if you’ve ever been stuck out somewhere, exposed to the beating sun, and dealing with an intense sunburn, you will definitely understand why this is part of the 10 Essentials list.
Remember that sunburn can still happen even on cloudy days and in the winter and sun intensity can increase when you’re in snow, on the water, and at higher elevations.
Sun Protection Options:
- Baseball cap or wide-brimmed hat
- Sunglasses
- UV-protective clothing
- Sunscreen
- Lip balm
- Buff
What I carry: I much prefer covering up with long sleeves and pants to slathering sunscreen all over and having to reapply throughout the day. I will still use SPF lip balm and sunscreen on any exposed skin and prefer a stick version that allows application without getting my hands greasy. I also always wear a hat and take sunglasses along, especially when I’m in snowy conditions or out on the water.
SHOP SUN PROTECTION: REI | MEC

MAKING THE MOST OF YOUR 10 ESSENTIALS
Now that you know what to pack and why, here are my top tips for making the most of your 10 Essentials.
REDUNDANCY, REDUNDANCY, REDUNDANCY
One thing I will always recommend when it comes to safety is having a plan b.
I know how easy it is to leave items behind when we’re trying to save weight and space in our packs, especially for safety items that we may (hopefully) never have to use. However, this is not the time to skimp.
Whenever possible, carry at least two items that can serve each system in case something fails or malfunctions. Examples of this include:
- A paper map/compass and a GPS
- Water purification tablets and a filter
- A lighter and a flint
KNOW HOW TO USE YOUR GEAR
In a true survival or emergency situation, you’ll be relying on your skills and on the gear you pack to help keep you alive. You need to know how to use that gear BEFORE you head out on the trail.
There is no point in carrying a map and compass you don’t know how to read or a flint you’ve never struck. You might feel like you can just “figure it out” if you need to. But when you’re lost, tired, scared, and borderline hypothermic, it is not the time to wing it.
For any piece of gear that requires knowledge or skill to use, take the time to practice with it at home and build up that muscle memory for when you really need it. Level up by taking courses like wilderness first aid, navigation, and bushcraft/survival.
DON’T RELY ON OTHERS
I’m a big advocate for taking responsibility for yourself in the backcountry. Even if you are going out on adventures with other people, do not rely on them to get you out of a bad situation.
You don’t always know what other people have in their pack, if they are prepared to use it, or what skills and knowledge they actually have (despite what they may tell you). There is also always the possibility that you could get separated and be forced to deal with things on your own.
Carry your own kit, learn how to use your own gear, and always be striving to improve your skills.
PACK FOR THE RISK LEVEL
The 10 Essentials are meant to be your safety net for extreme and unexpected situations and should be carried on any outdoor adventure, no matter how small and seemingly safe.
Having said that, you may want to adjust the specific items you take with you based on the type of adventure you’re heading out on. For example, higher-risk activities might call for a more robust first aid kit, warmer clothing layers, or a more technical repair kit.
Things that can increase risk include:
- Rough or technical terrain
- Exposure
- Variable or extreme weather
- Remoteness
- Dangerous wildlife
- Being unfamiliar with the area
Make sure you’re packing gear that is appropriate for the environment that you’re adventuring in and always be evaluating your kit as your activities evolve.
I’m a huge advocate for getting out there, no matter your experience or skill level. But I’m also a huge advocate for being as prepared and safe as possible. Carrying the 10 Essentials and knowing how to use them will go a long way in making you a more self-reliant and safe adventurist.
Find more on staying safe in the outdoors here: