BACK TO THE LAND BEGINNER: MY FIRST VEGETABLE GARDEN
As part of our efforts at becoming more self-reliant, growing our own food has become a significant focus of mine lately.
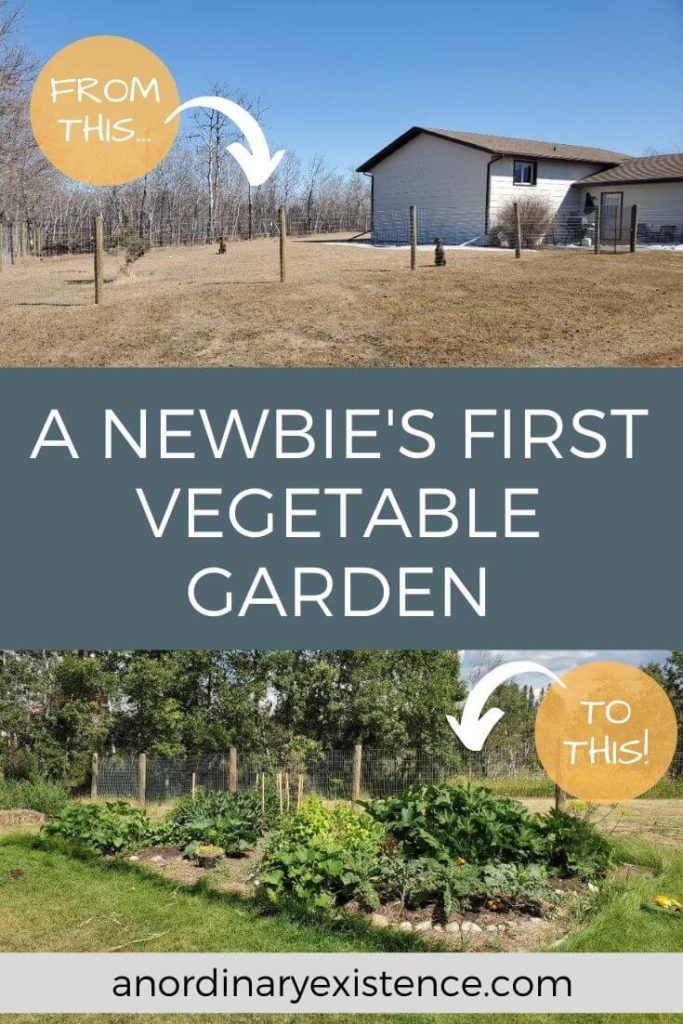
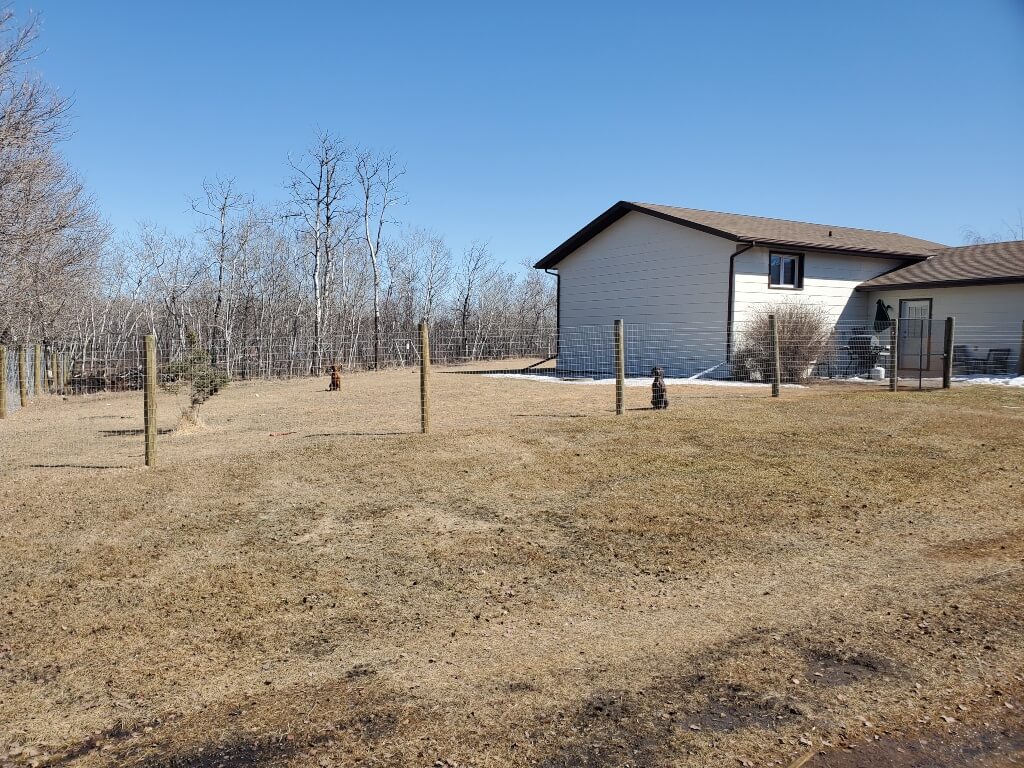
In the fall of 2019, we moved to Mark’s childhood home, which sits on 7 acres of land. Most of this is currently in the form of horse pasture, lawn, and pockets of native trees, shrubs, and ground covers reflective of the aspen parkland biome in which it is located. One of my big goals is to utilize some of this land to produce food.
This post may include affiliate links. As an Amazon Associate I earn from qualifying purchases. Find more info in my privacy policy.
I have spent much of the past year+ reading and learning as much as I can about gardening, permaculture, agroecology, and other sustainable food production systems. I have grand plans of food forests, pollinator gardens, swale and pond systems, and possibly even some small animal livestock thrown into the mix. But these are long-term goals that will be phased in slowly over time and I have to start somewhere. So, in the spring of 2020, I decided to dive into a test plot of sorts and establish a small kitchen garden.
Now, a small vegetable garden may not seem like a big deal to most, especially for a farm kid from Saskatchewan. Surely I should know how to garden! However, while I do remember occasionally helping (read: eating enough freshly shelled peas to make me sick) in my mom and grandmothers’ gardens when I was small, I really never took the time to learn the ins and outs of growing food. This process is almost entirely new to me.
On top of that, I’ve been looking into the most low-maintenance, locally appropriate, sustainable methods of growing. The no-till, heavily mulched, densely intercropped gardens that I’ve been reading about in books and learning about from my university’s gardening program are a far cry from the roto-tilled, manicured expanses of black dirt with straight rows of individual crops that I’m used to seeing.
This is a lesson on re-learning everything I thought I knew about gardening.
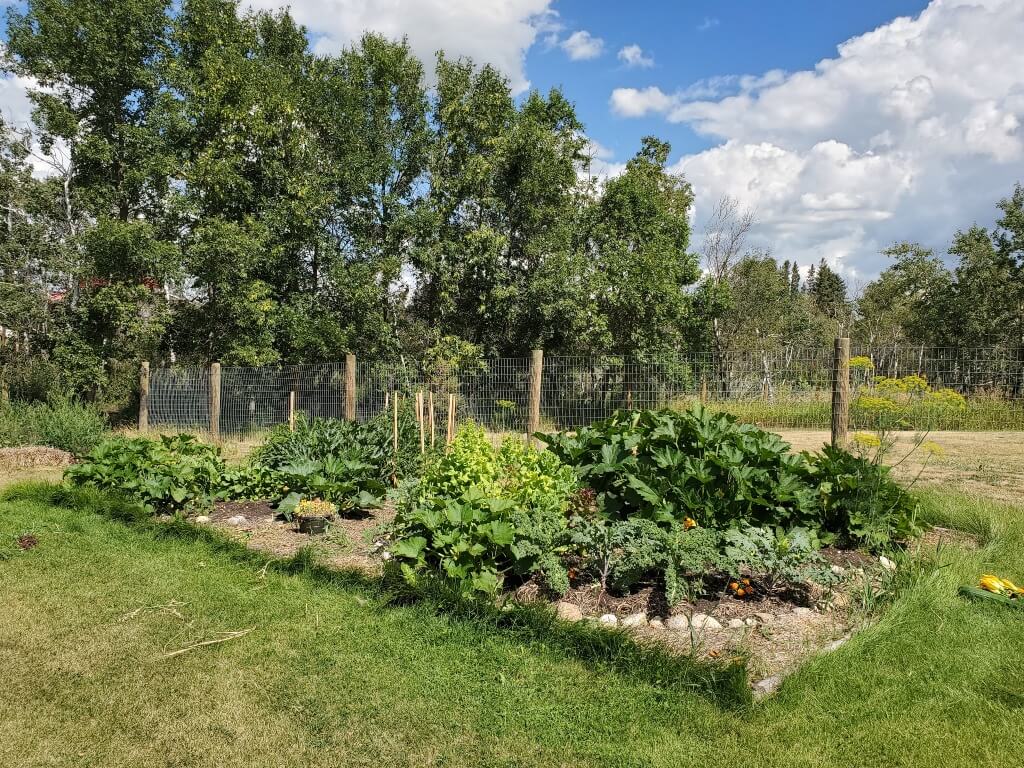
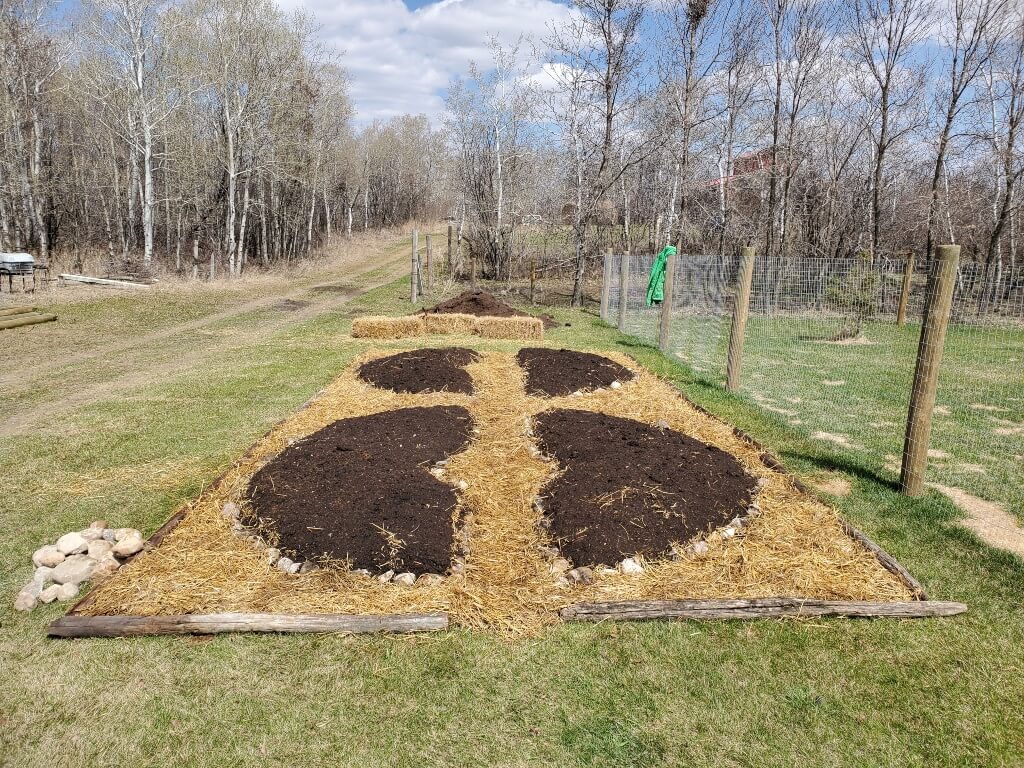
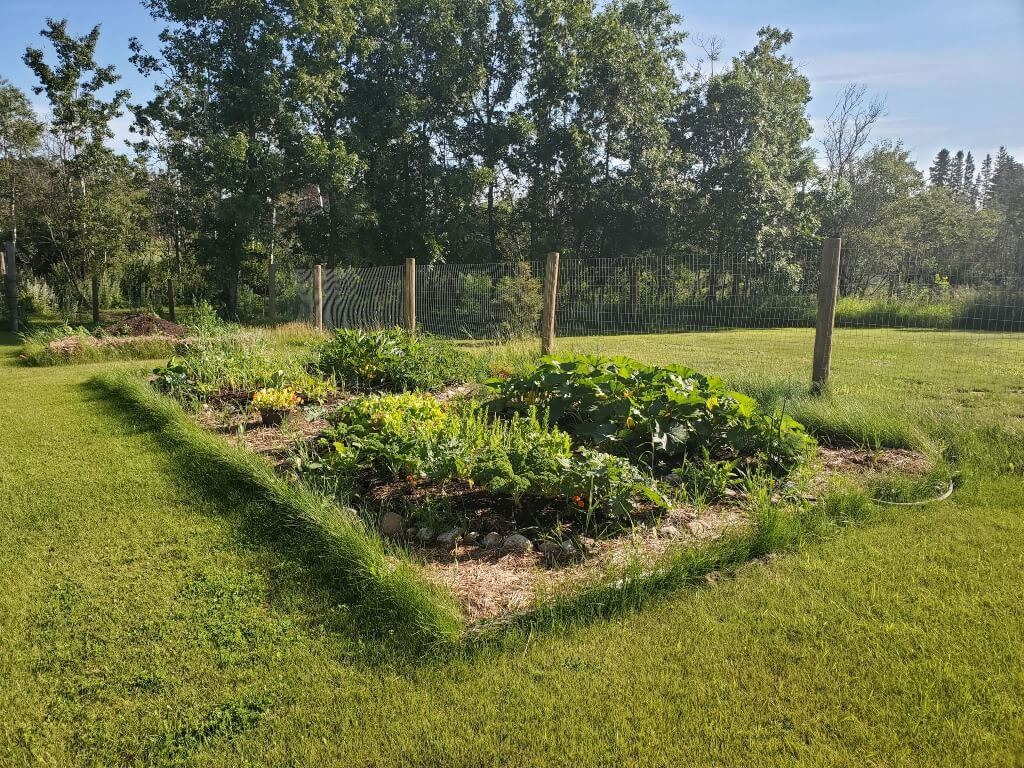
After much consideration, I settled on a location, settled on a plan, gathered the materials I needed, and got to work. I converted an approximately 13′ x 26′ patch of lawn into four keyhole-inspired garden beds using sheet-mulching methods. Below, I’ll walk you through how I did it and what the results were for this gardening newb.
Site Selection
My first task was to choose a spot to situate the garden. With seven acres to work with, that was no easy feat.
Permaculture, for those not familiar, is a design science that uses zones and sector analysis (among other things) to produce a whole system design aimed at utilizing and closing energy loops. The aim is to create a self-sustaining system. At least, that’s what I think it is in a very small and slightly convoluted nutshell – I’m still learning! I’ll try to dig a little more into permaculture in a separate post in the future.
For now, I’ll just say the principles and methods of permaculture influenced me to site the garden in Zone 1 – which is close to the house and close to a water source (currently an outdoor tap but eventually will be rainwater collection from the house and garage roof). Observation and sector analysis also helped me consider things like sunlight hours and shelter from our Saskatchewan winds.
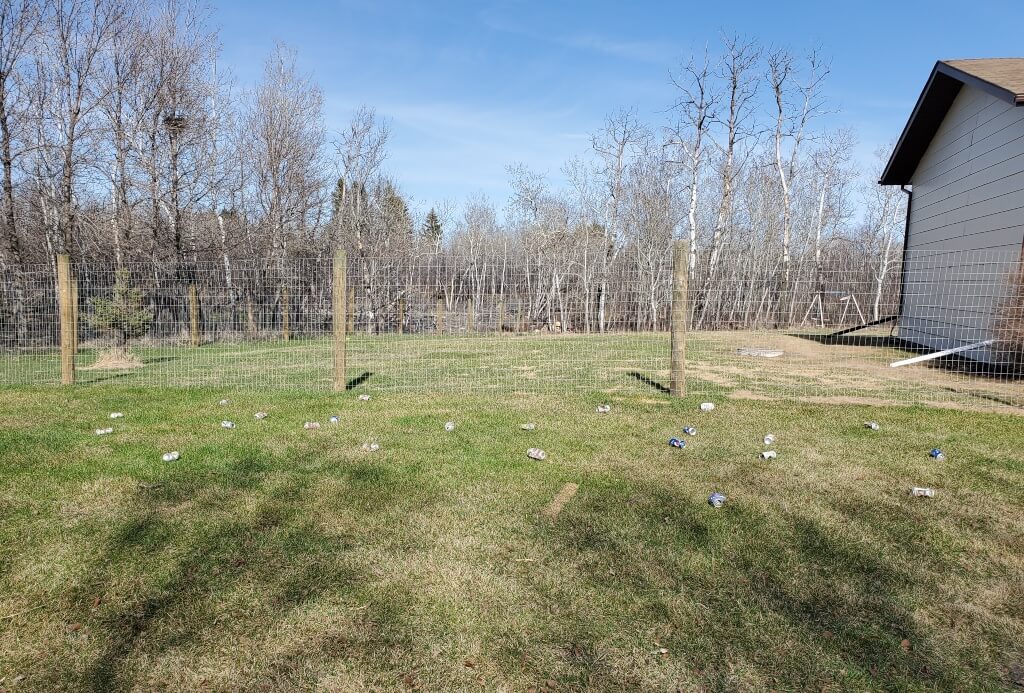
In the end, I chose a strip of lawn directly behind our garage, between the dog run and the lane that leads back to the barn.
Soil Testing
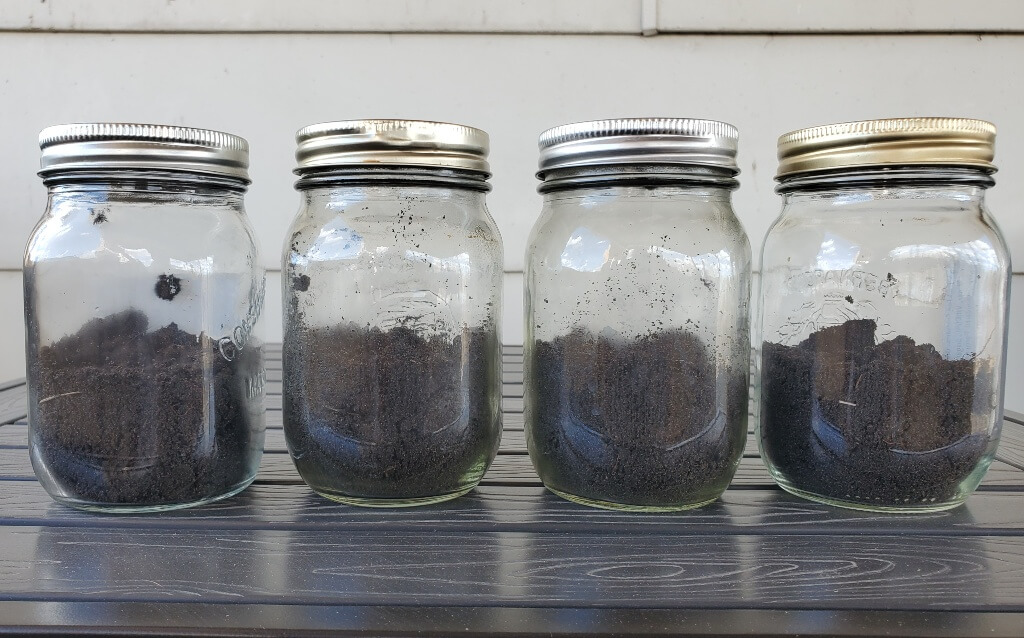
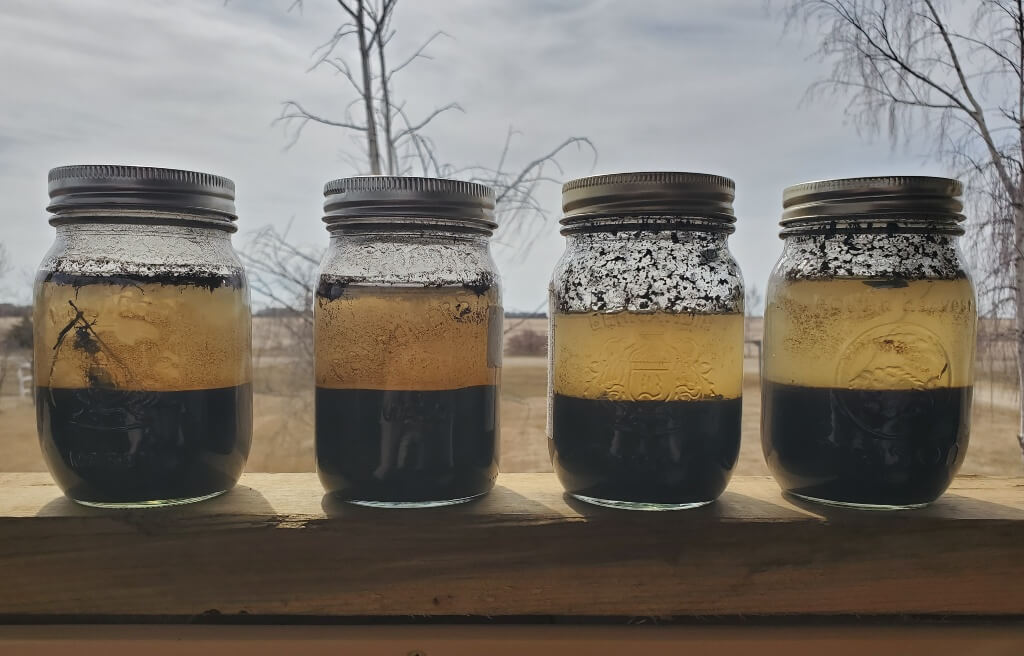
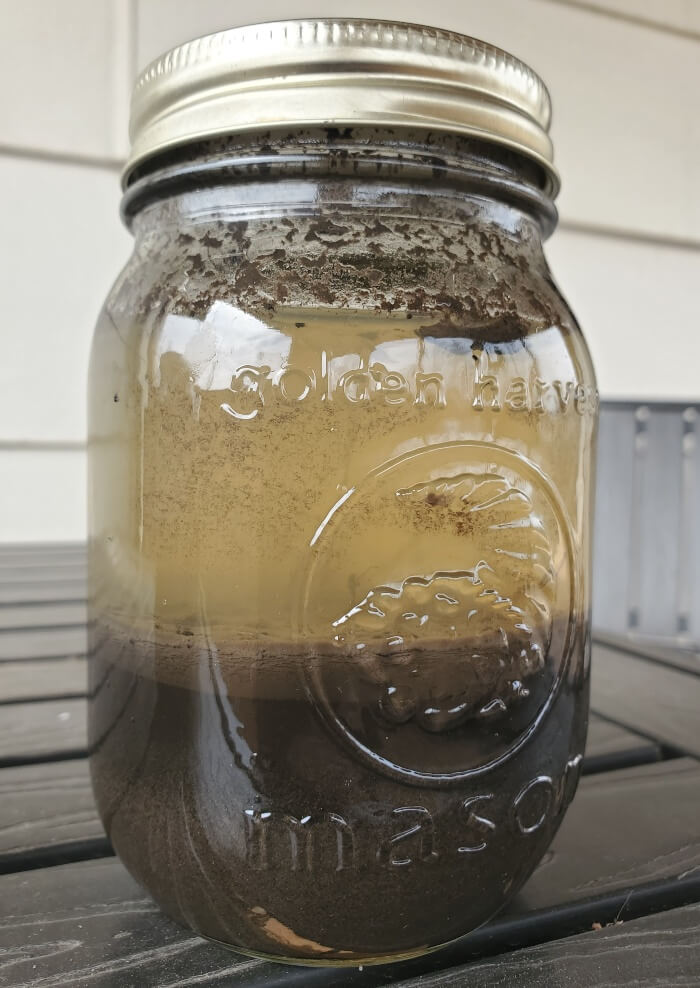
An essential part of permaculture is careful consideration and observation of your site to learn as much as possible about where you’re growing. I decided to do a simple soil composition test using mason jars and a bit of water to find out what type of soil I was working with.
It’s a very easy process. Just dig down about six inches into the spot you want to test, fill a mason jar about half full with soil, add water, give it a good long shake, and then let it sit undisturbed for at least 24 hours. As the jars sit, the particles will settle out in layers — sand at the bottom, silt in the middle, and clay on top. A bit of measuring and math will get you the percentage of each, and then you can use a soil texture chart to determine your soil type. I ended up with about 20% clay, 30% silt, and 50% sand, which gives me a loam/sandy loam soil. I was pleased about that as loam is an ideal soil type for growing.
I would have like to also do more intensive lab tests on the soil to learn what kind of chemical composition I’ve got going on but unfortunately did not have a chance to do that before planting.
Garden Bed Design
Once you move away from the idea of a garden being a black dirt rectangle with straight rows, designing your beds becomes much more complicated – there are so many options! You can start to play around with bed shapes and sizes, placement, creation of microclimates, and many other factors.
Keyhole beds are meant to maximize space use while still allowing for access to the entire bed without having to step on and compact the growing area. Think of a donut with a bite out of one side that allows you to access the center hole to reach the bed from both inside and outside. There are several variations in the design of keyhole beds. They can be raised or in-ground, include a compost area in the center or not, and vary in size.
I decided to go with a somewhat keyhole-inspired design, creating two round beds with a center hole. My one variation was to have the path extend through the entire garden bed, leaving me with four semi-circle beds. My reasoning behind this was that I wanted a “flow” through the garden toward the back, as I have future plans for this site as well. Each bed is 4′ across, which allows me to comfortably reach all parts of the bed from one side or the other without having to step on the growing area.
Converting Lawn to Garden with Sheet Mulching
Sheet mulching (aka lasagna gardening) is a method of smothering an existing lawn and establishing a garden bed at the same time. It involves layering various materials that will eventually break down and feed the soil while also blocking grass and weeds from coming up. There are as many “recipes” for sheet mulching as there are articles written on the subject. After much reading, I used what I had available to me and made up my own version of a cardboard/horse manure/straw lasagna. Yum.
Here are the steps I used:
1 – Mow the lawn as short as possible.
2 – Mark out the perimeter of the bed. I happened to have a bucket of empty cans handy, so I used that (hey, whatever works, right?).
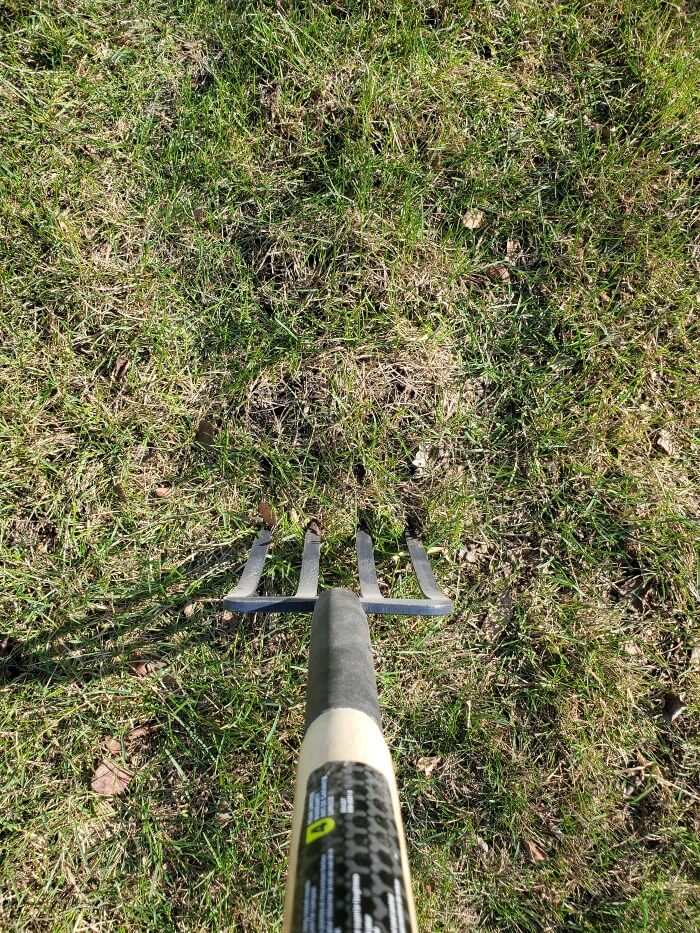
3 – Aerate the soil with a pitchfork. This was simply inserting the fork as far as I could into the lawn and rocking it back and forth to slightly loosen the sod and create tunnels that help move water/microbes/nutrients/etc. up and down. I did this over the entire 13′ x 26′ area.
4 – Spread ~1 inch of fresh horse manure directly on top of the lawn. I then let it sit to get rained on. A garden hose would have worked too, but I thought I’d let nature take this one for me.
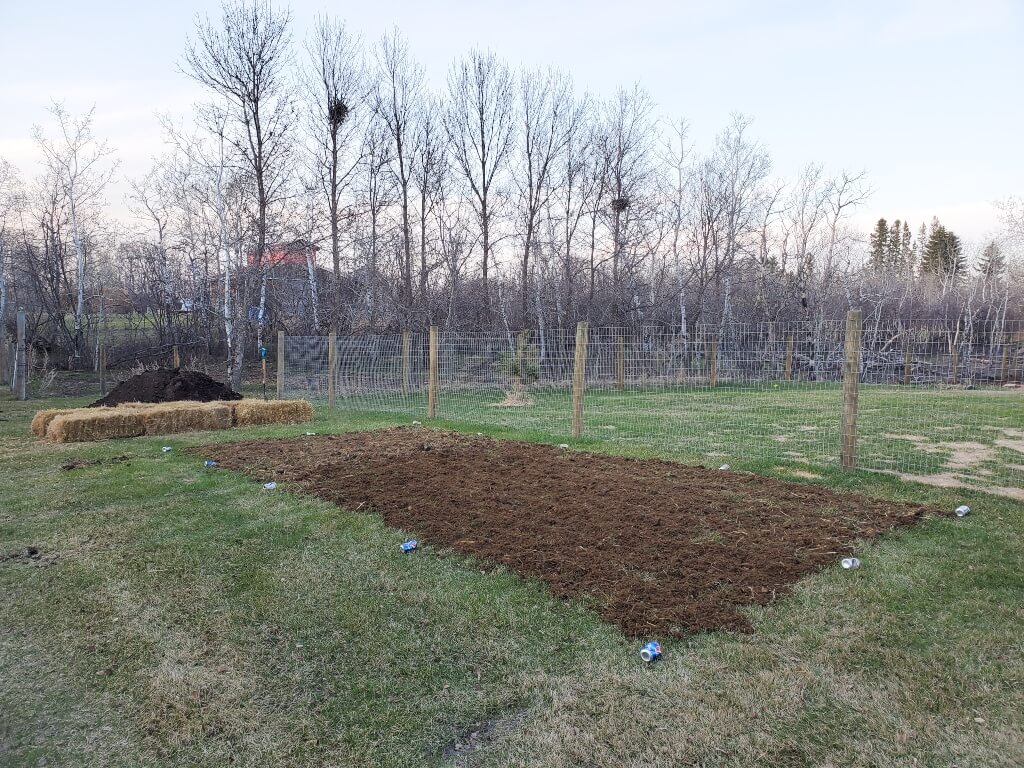
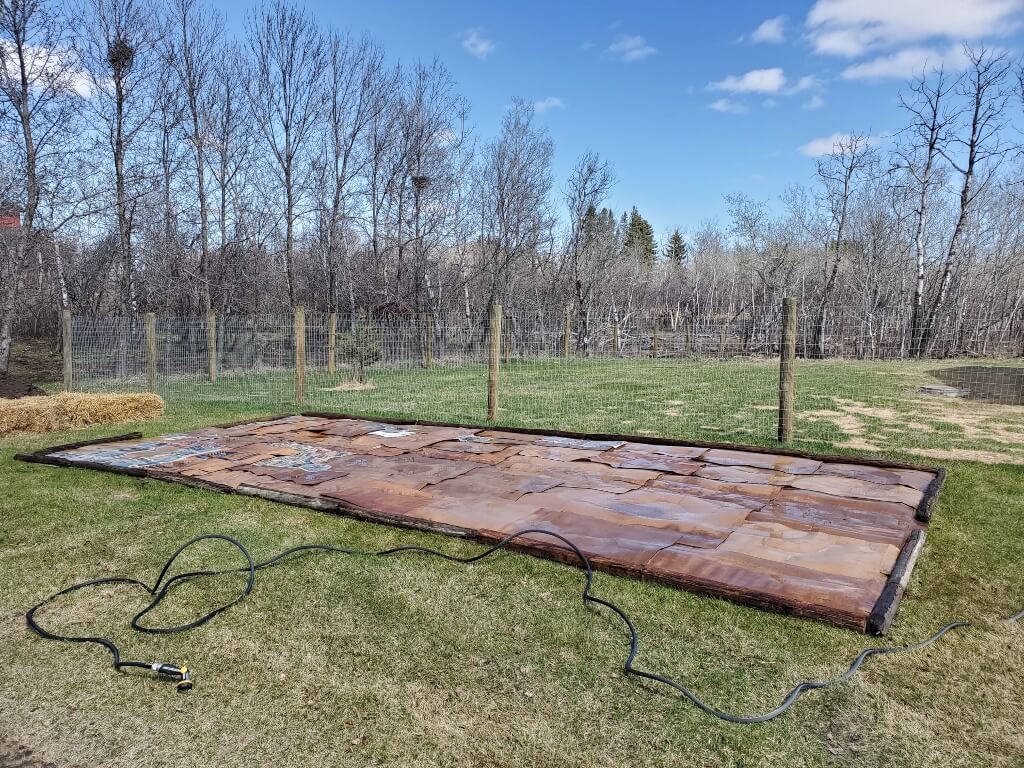
5 – Lay down flattened cardboard. I ran a bit short and ended up using newspaper (about ten sheets thick) in some areas. I watered as I went to try and keep the cardboard from blowing away. I also used old fence posts I collected from around the yard to define the area’s outside edge.
6 – Define the edges of growing beds with rocks. This was mostly just so I could get the beds somewhat even and symmetrical.
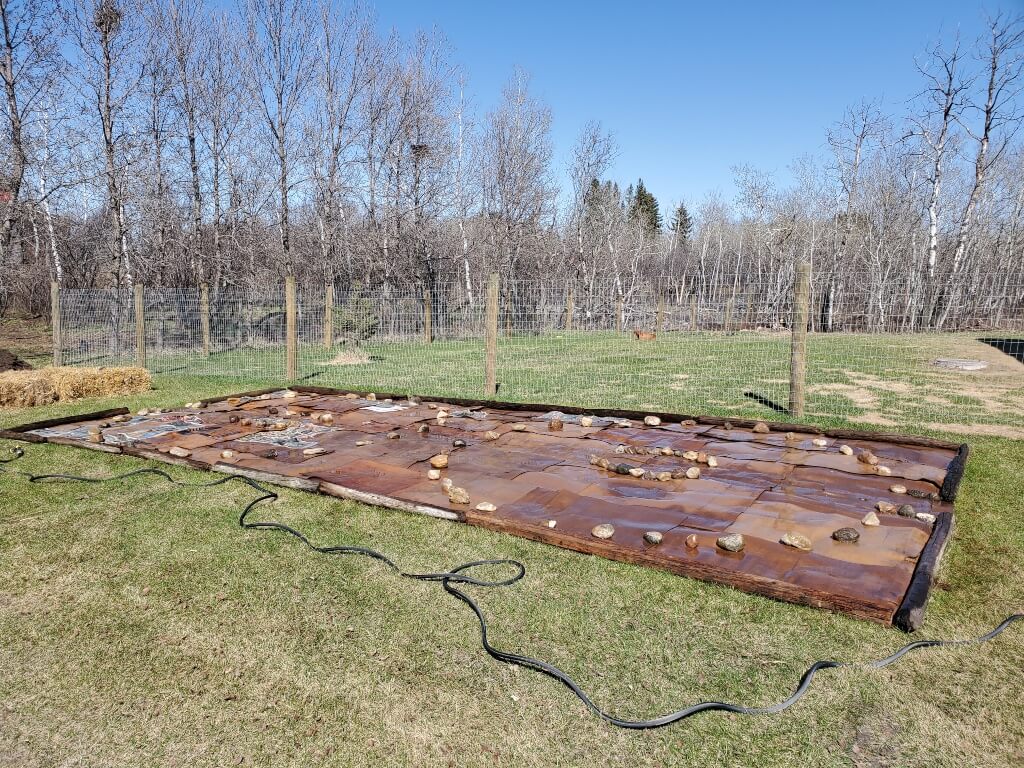
7 – Add a layer of composted horse manure to growing beds. I put down about 1-2″ of well-aged manure over the cardboard, which I had watered to make sure it was good and soaked prior to the manure layer. I then watered the manure layer as well.

8 – Lay down straw mulch. I put down about 4-6″ of straw in the growing areas and about 2-3″ on the pathways. I experimented by using some solid “chips” off the square bales and some more fluffed and broken up straw in various places. I then walked the pathways and edges to try and tamp down the mulch as much as possible.
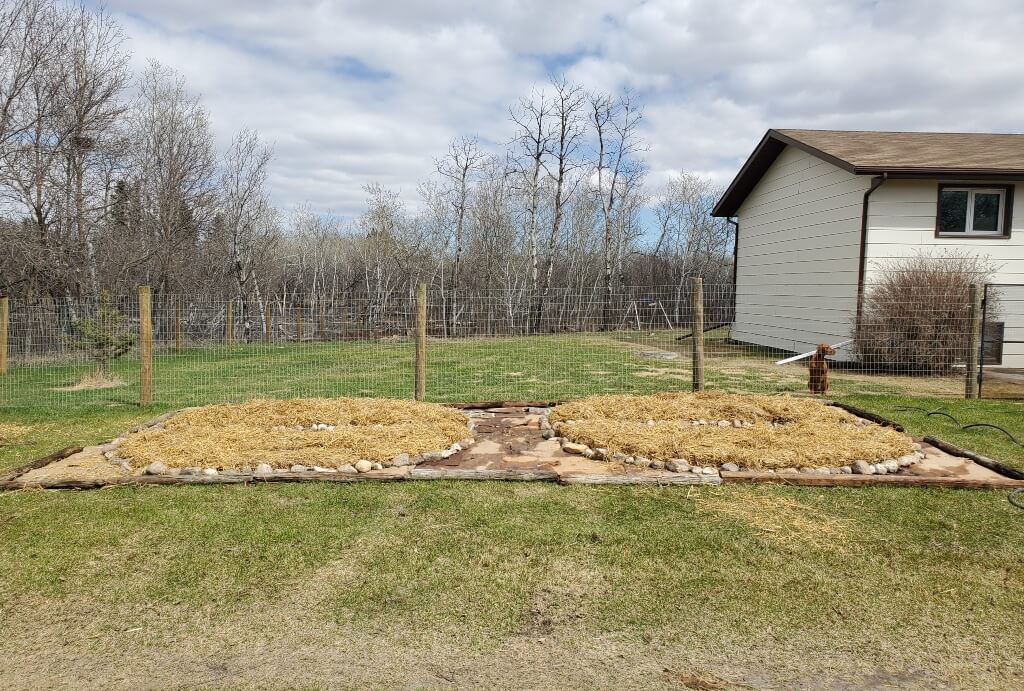

9 – Add a final layer of composted horse manure to growing beds. I finished off the beds with about 2-4 inches of well-aged horse manure and watered it all to makes sure it was good and soaked through.
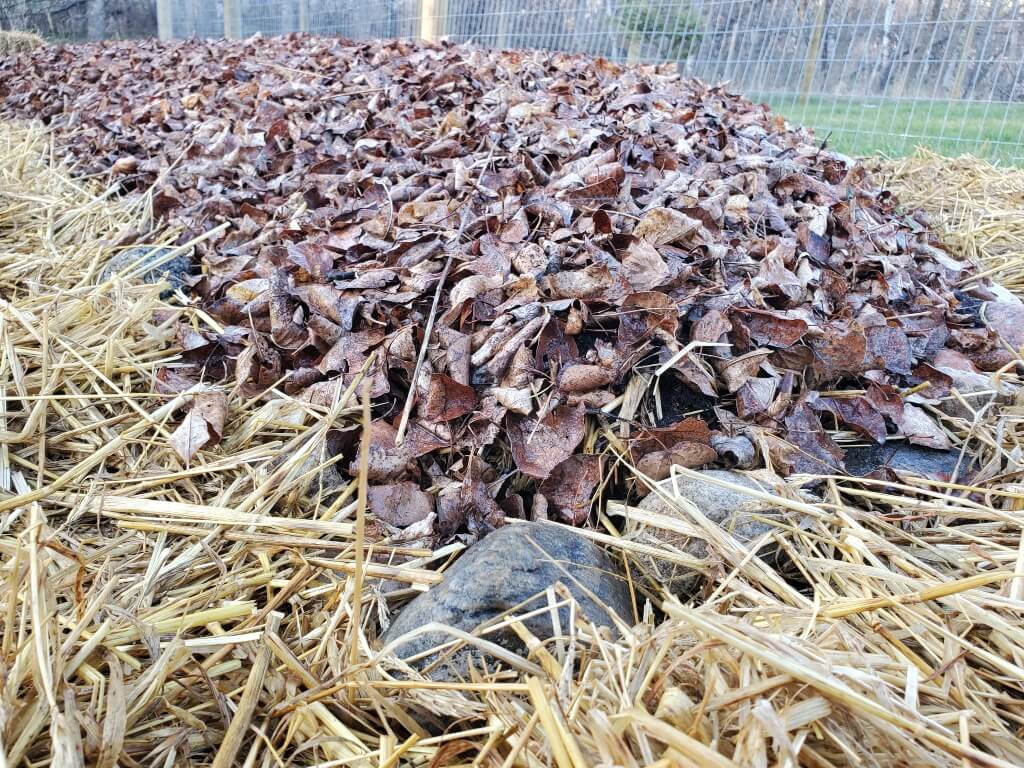
I also tried putting down a layer of leaf mulch on top of the growing beds, but I didn’t take the time to shred it first and it all ended up blowing away after a few days of big winds.
After I had already established the beds this way, I learned that this might not be the best method of establishing a garden, especially in our climate. According to this line of thought, sheet mulching (particularly the layer of cardboard) can impede water and nutrients from cycling properly. In addition, our short warm season means that the breakdown of materials doesn’t happen fast enough. Despite my successes this year (read on for more on that), I think I’ll be trying out different methods of converting lawn to garden in the future.
Planting the Beds
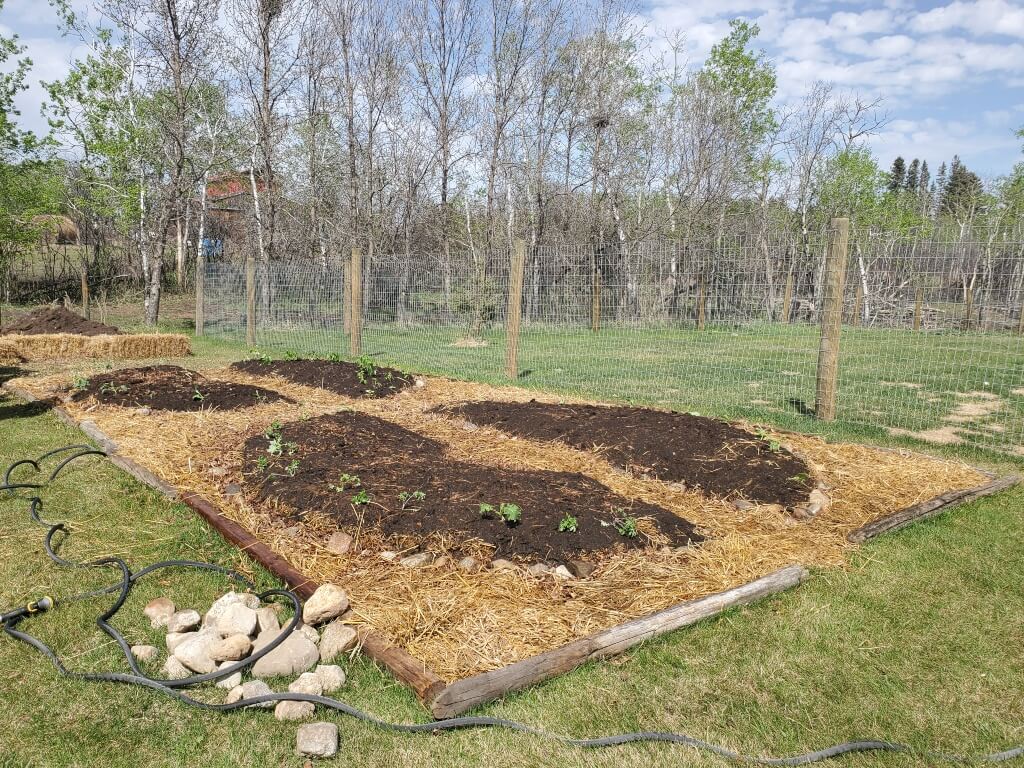
Some say that sheet mulched beds should sit for an extended period of time (months or even a full season) before planting, while others say you can plant directly into them once they are built. I figured I would give it a go and see what happened by planting into them right away. I planted the beds about five days after I had finished building them. My thought was that even if I lost everything, at least I would learn something.
I used a mix of seeds and starts I had gotten from a local greenhouse for planting. I did a little research and tried my best to utilize companion planting and dense planting to maximize space use. Here’s how I planted:
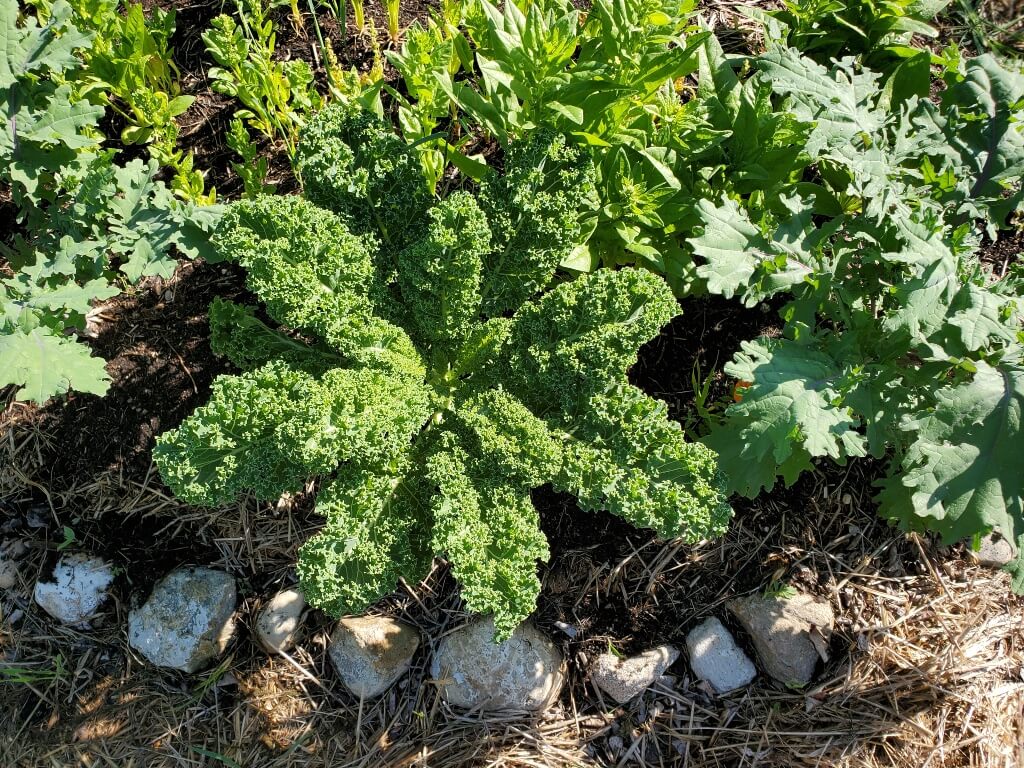
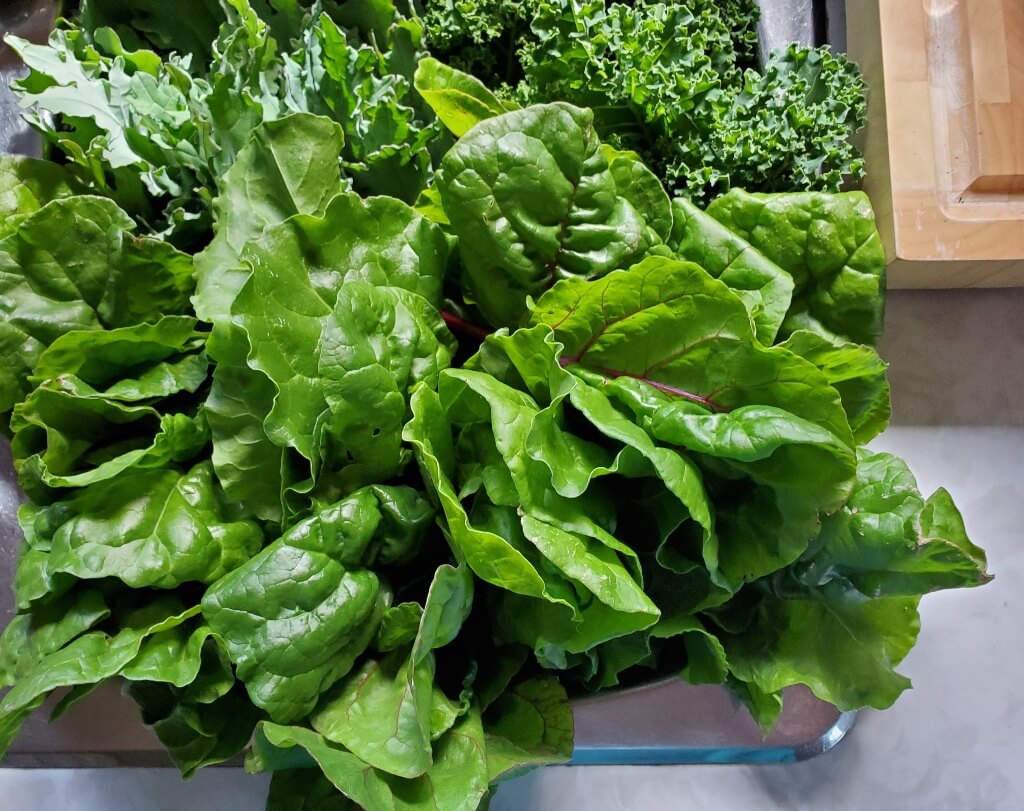
Bed 1: marigolds (starts), kale (starts of Red Russian and Prizm), spinach (from seed), a lettuce mix (from seed), and oregano (starts).
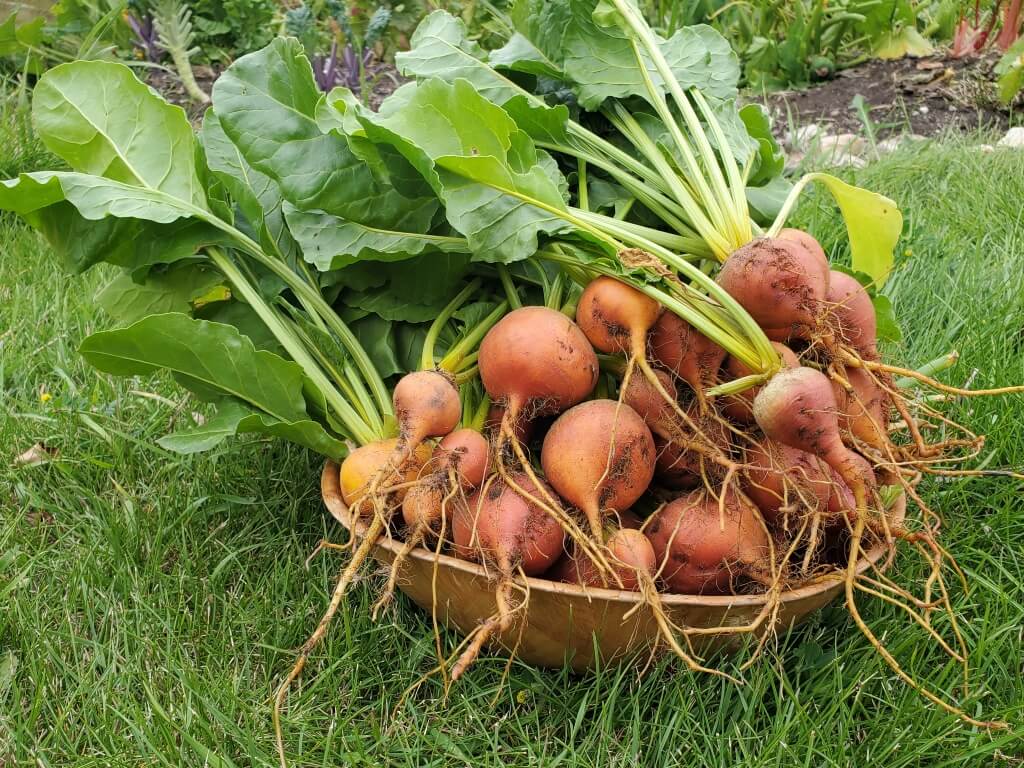
Bed 2: broccoli (starts), cauliflower (starts), onions (red and yellow, from sets), beets (from seed), radishes (from seed), and oregano (starts).
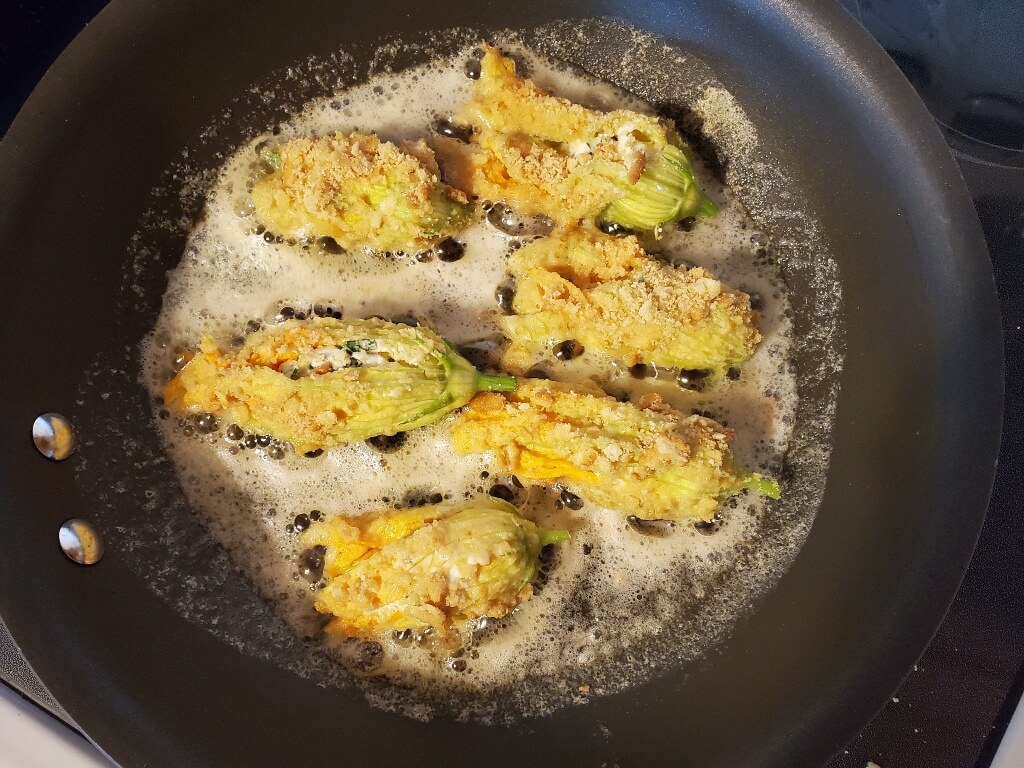
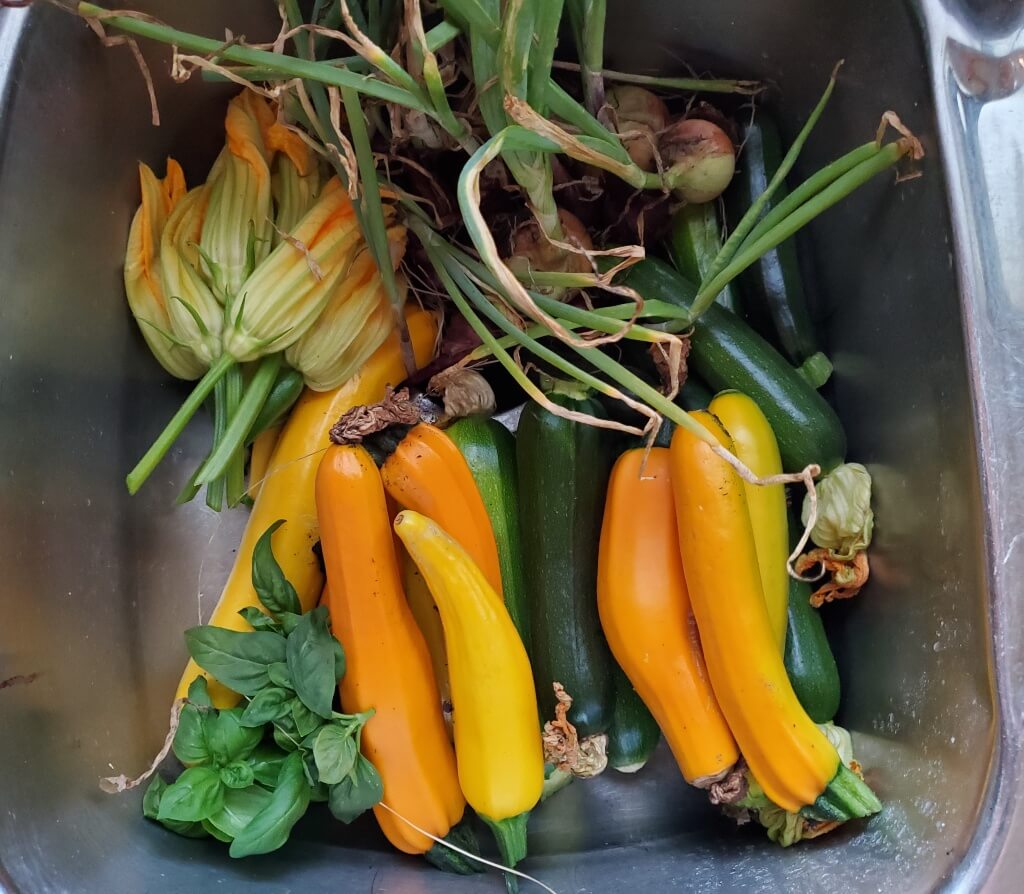
Bed 3: dill (from seed), green cabbage (starts) *I also had purchased red cabbage starts, but Gus decided to use these as a chew toy while I was hardening them off on the deck one day*, cauliflower (starts), swiss chard (from seed), and zucchini (from seed).
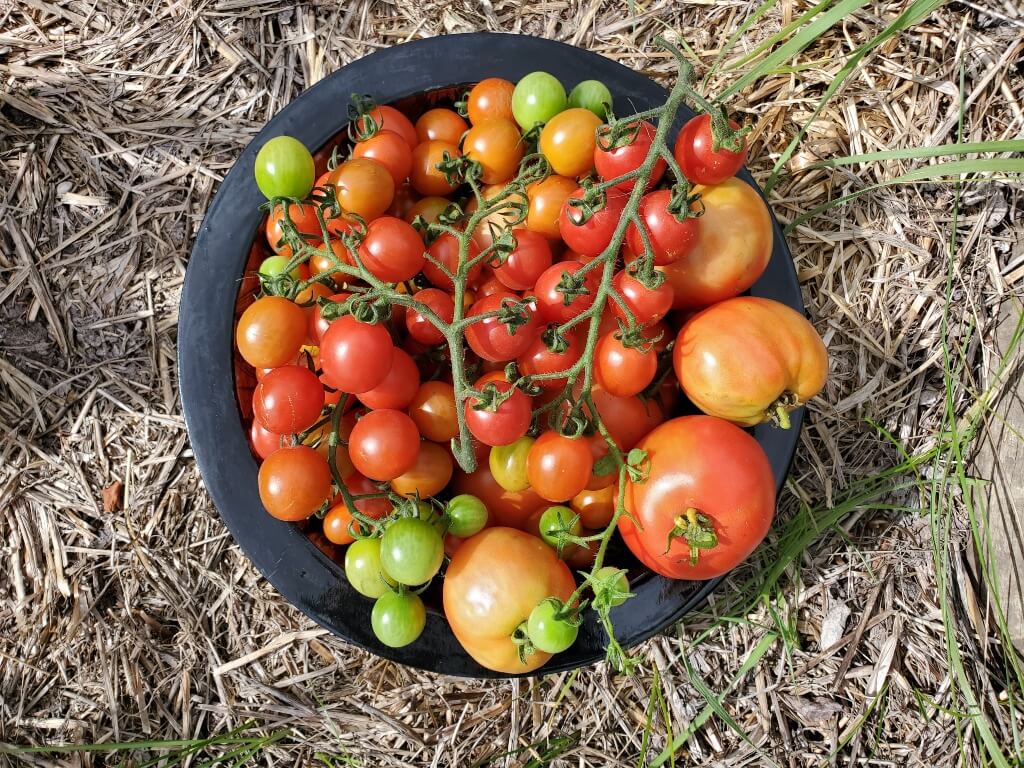
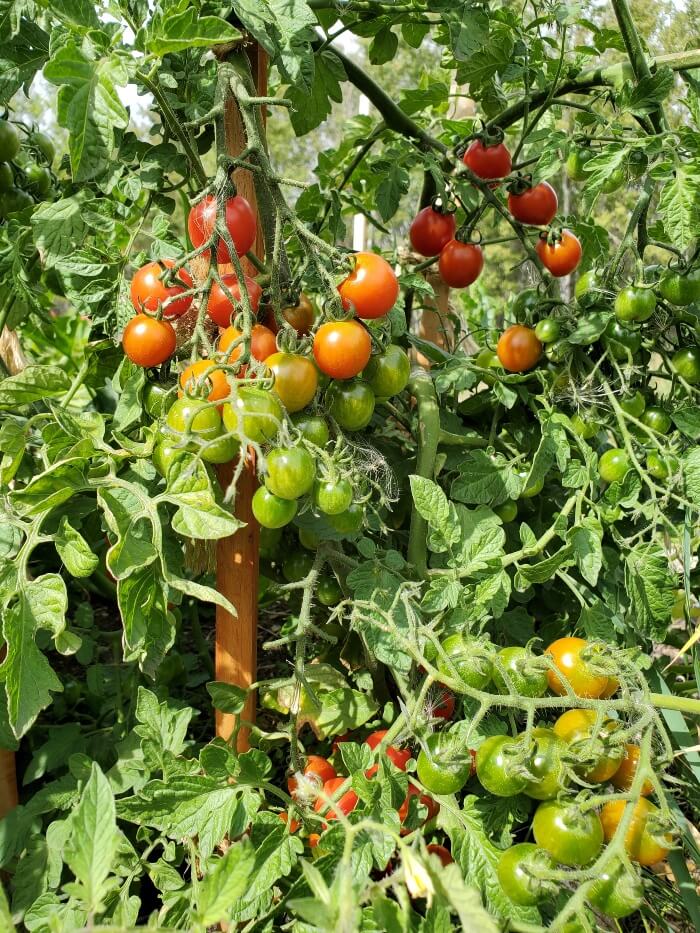
Bed 4: basil (starts), tomatoes (starts, a variety pack of various types and sizes), peppers (starts, multiple types), summer squash (from seed).
This all just went into the top layer of composted manure that topped the beds.
In the name of being completely transparent, I must admit that this was not exactly my first crack and growing my own garden. When we first moved into our house in town, there was an old, neglected garden plot in the backyard. I wanted to grow food, but I also thought the idea of having to fawn over a garden day in and day out was ridiculous. I had Mark till it for me, threw some seeds down, watered it haphazardly for a few days and then left it to its own devices. It unsurprisingly grew nothing but weeds. With the bit of knowledge I have now, I am surprised it even grew the weeds. The soil was incredibly sandy, it did not get nearly enough sunlight, and likely had almost no fertility. To get anything to grow there would have required a ton of intervention on my part, and my laissez-faire attitude to gardening was not conducive to growing in those conditions. I’m learning now that, as in cat skinning cliches, there are plenty of ways to approach gardening. My hope is that the lower-maintenance, water-conserving techniques I’m attempting to recreate now will result in a bit more success. Fingers crossed.
Maintaining the Beds Over the Summer
I have to admit I was worried about keeping up with the garden over the summer. Would I have to dedicated never-ending hours to weeding? Would I be chained to my garden hose to keep up with watering? Was the sheet mulching really going to keep the grass from coming up? How were the plants going to survive while we were at the cabin?
This summer was a bit different for us as we could not travel to the cabin until mid-July due to Covid restrictions. This meant I was around home to keep a close eye on things and make sure watering happened when it needed to earlier in the season. Occasional rains helped too, but watering was not nearly as demanding as I thought it would be. The whole idea behind the intense mulching is to retain moisture in the ground, and it did seem to help a lot. Even once we were able to travel again, I just kept an eye on the forecast at home and only had to get someone to stop out and water for me a few times.

Weeding was also not as bad as I was expecting. The horse manure I used was far from being weed-free, and there were plenty of unwanted plants sprouting up, but the nature of the sheet mulched beds made it incredibly easy to pull what I wanted to get rid of. I found I could quickly weed the beds in 15-30 mins every so often without too much trouble. I even found it became enjoyable to wander out to the garden and spend some quiet time pulling weeds every few days. Once the plants started to grow in, the weeds slowed way down, and this became even easier. I did have to pull some grasses that were encroaching on the beds, but this too was not as bad I was expecting.
The Results
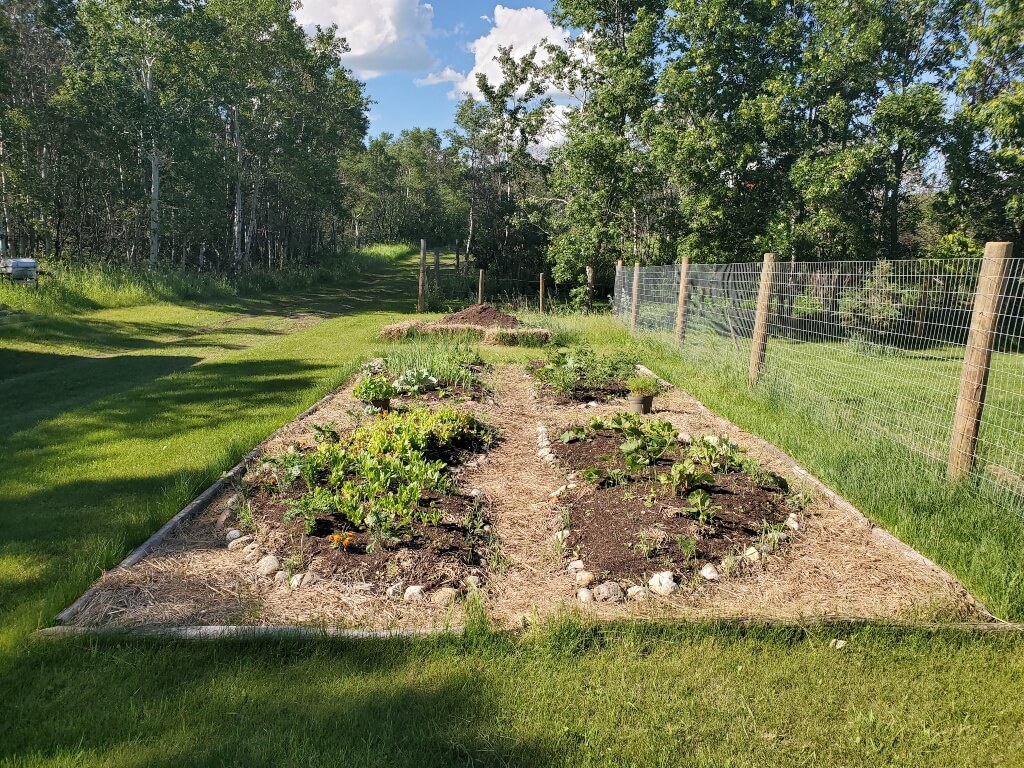
I had a bit of a mixed bag as far as successes and failures in the garden, but overall I was pleasantly surprised by how well it did.
The greens did amazingly well, and I was harvesting spinach and kale by June 13. The lettuce and chard did great too. Despite my success with the kale, most of the other brassica starts (broccoli, cauliflower, and cabbage) were toast early on. I’m not 100% sure if this was because I rushed the hardening off process prior to transplanting or if it had something to do with pests/disease or the beds themselves. I ended up transplanting some of my zucchini and summer squash seedlings as I was thinning them out to fill in the gaps left by the failed brassicas.
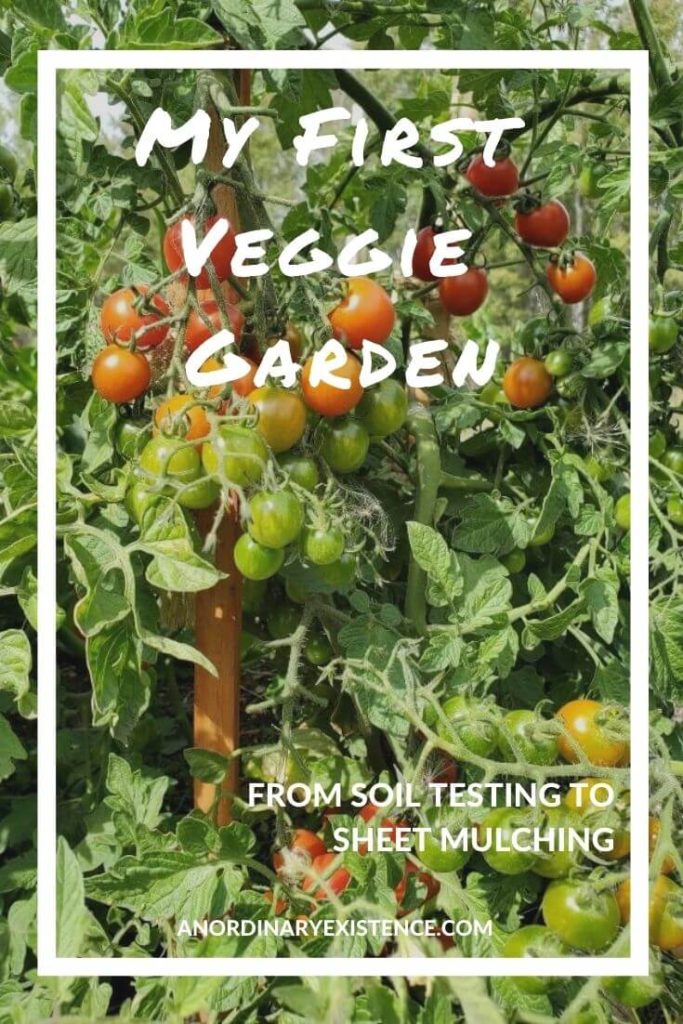
My peppers also struggled and only produced a few small ones, though I’m quite sure it was the rushed hardening off plus the intense and sustained winds that came up immediately after I transplanted them that was the problem there. The tomatoes did great though, and I have bags and bags of them in the freezer still awaiting the motivation to do something with them.
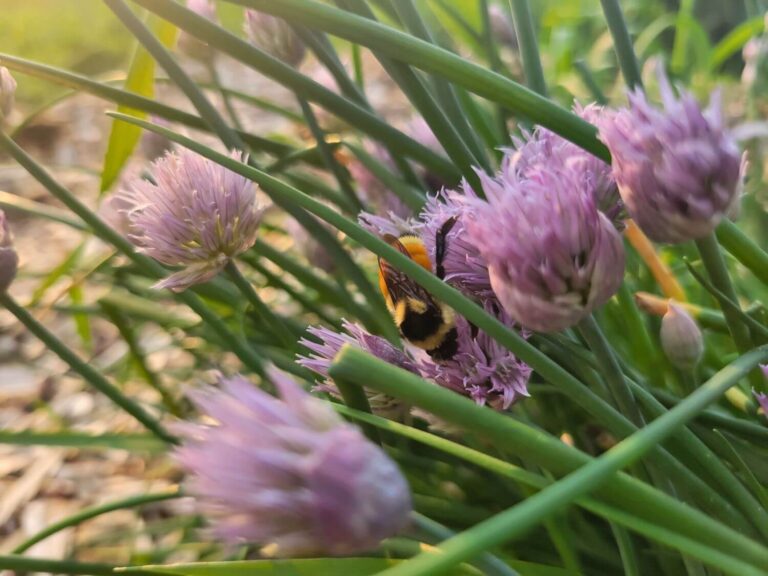
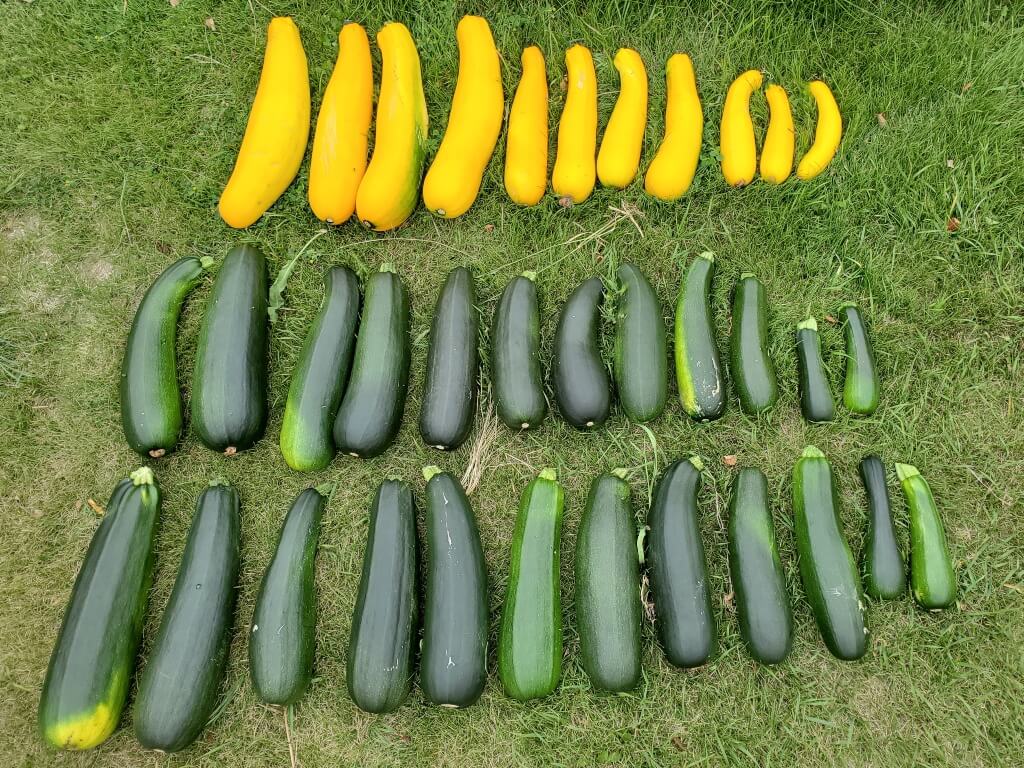
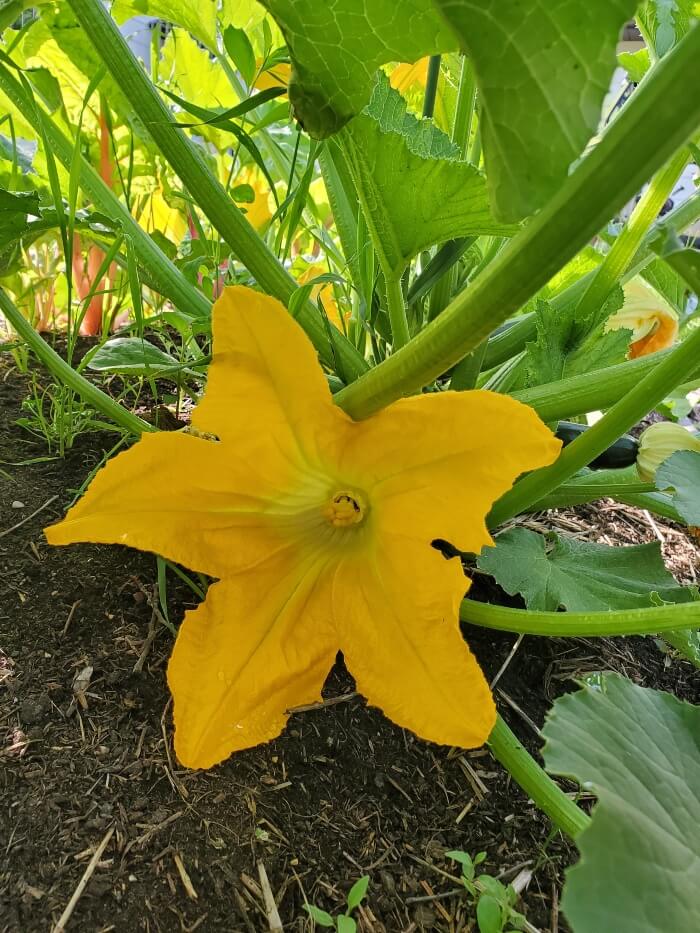
I was also happy with the harvest I got from the beets and radishes. Onions did ok, and I was able to harvest and use them, but they didn’t reach the size I was hoping for. The herbs did well and the basil even came back from a late frost which surprised me. The real star of the show though, ended up being the zucchini and summer squash. Even with harvesting a fair amount of squash blossoms, I still ended up with wheel barrels full of squash! I shredded and froze the vast majority as I couldn’t keep up with it.

I would classify my first attempt at a sheet mulched garden a success and I’m looking forward to seeing what the beds do next season.