A COMPLETE GUIDE TO BROODING QUAIL CHICKS
Quail chicks are delicate creatures who require special conditions from hatching until maturity to help them survive and thrive. This process is referred to as brooding – a term you may be familiar with if you’ve raised any type of poultry in the past.
After brooding multiple batches of quail chicks and learning a thing or two in the process, I thought I’d compile all my tips, tricks, and recommendations to help you successfully care for your day-old quail chicks until they are ready to move out to their permanent home.
This post may include affiliate links. As an Amazon Associate I earn from qualifying purchases. Find more info in my privacy policy.

THINGS TO CONSIDER BEFORE BROODING QUAIL CHICKS
Brooding quail chicks is not necessarily a difficult process, but it does require some preparation, time, and commitment on your part. Before diving in and getting quail chicks, be sure to consider some important factors when it comes to brooding quail chicks.
TIMING. Quail chicks will require brooding from hatching until around 4-6 weeks of age. When you move your quail out to their permanent home will depend on the environment they are going into.
If you are moving them to an area with a controlled climate or a coop during warmer months, they will likely be ready to go out as soon as they have completely feathered out and lost their chick fluff around 4 weeks of age. If they will be exposed to cooler temperatures or harsher conditions, you may want to keep them in the controlled brooder environment a little longer.
SPACE REQUIRED. You’ll need to have a brooder that allows about .5 sqft of space per chick in a climate controlled, draft free location.
The brooder should be located somewhere easily accessible but keep in mind that the chicks will smell and make some noise. We place our brooders in a spare room in our basement where they are out of the way and secure but can still be checked on regularly.
TIME COMMITMENT. The quail chicks will need to be checked on and cared for multiple times per day throughout the 4-6 week brooding period.
Food and water will need to be checked, refilled, and refreshed regularly. Fresh bedding will need to be added daily, with a full change out of bedding every few days. Ensure you have the time needed to care for the chicks prior to getting them.
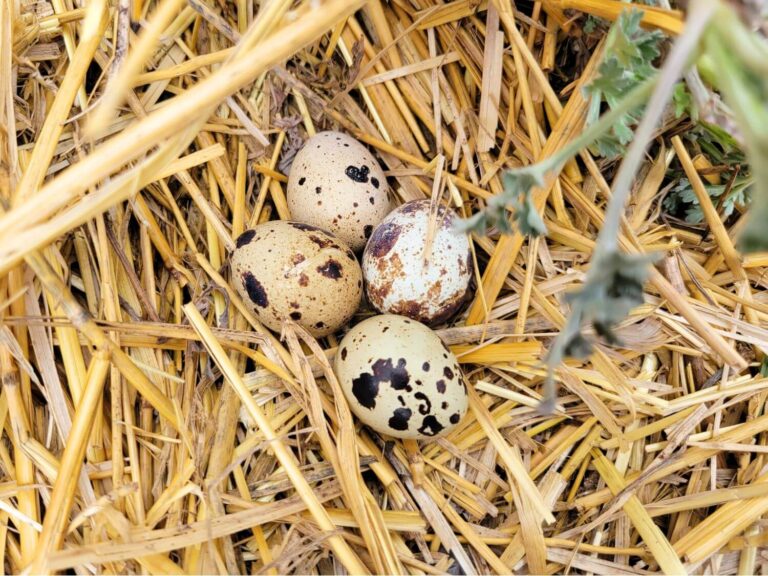
SOURCING QUAIL CHICKS. Depending on your location, you may be able to source day-old quail chicks from a local supplier. Alternatively, you may choose to incubate and hatch your own chicks. Check out my article on that process for a complete guide to incubating and hatching quail eggs.
QUAIL CHICK BROODER SETUP AND EQUIPMENT
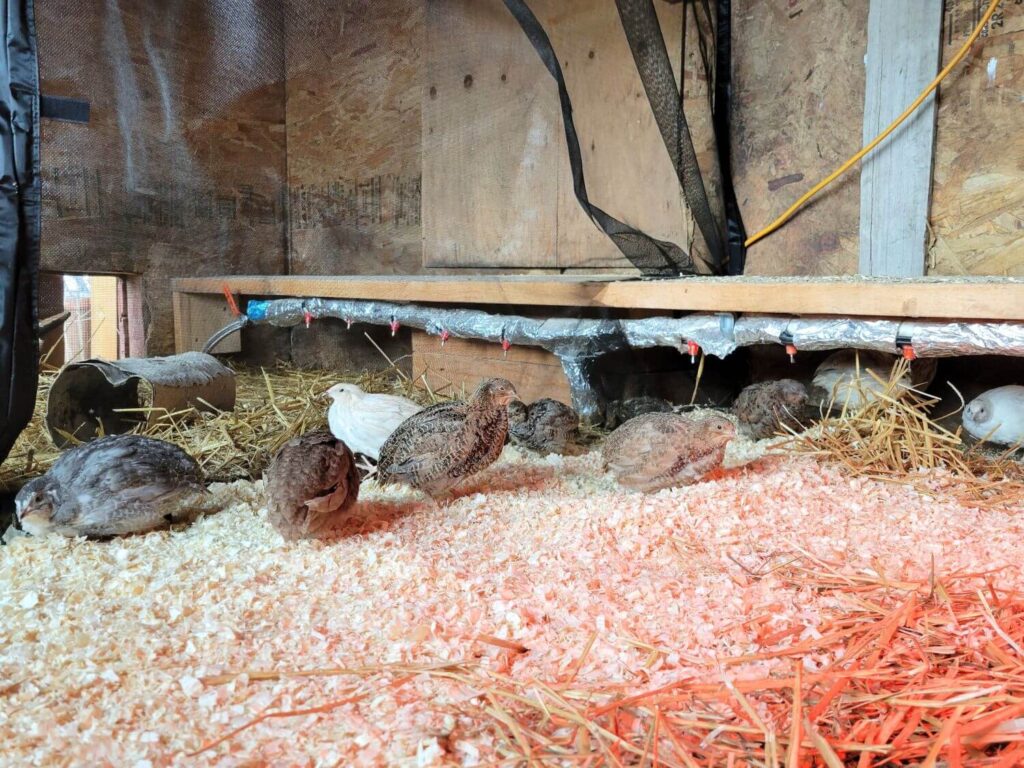
The most important part of brooding quail chicks is having a secure, draft-free, climate-controlled area for them to live in until they’ve developed their adult feathers and are able to handle more variable conditions.
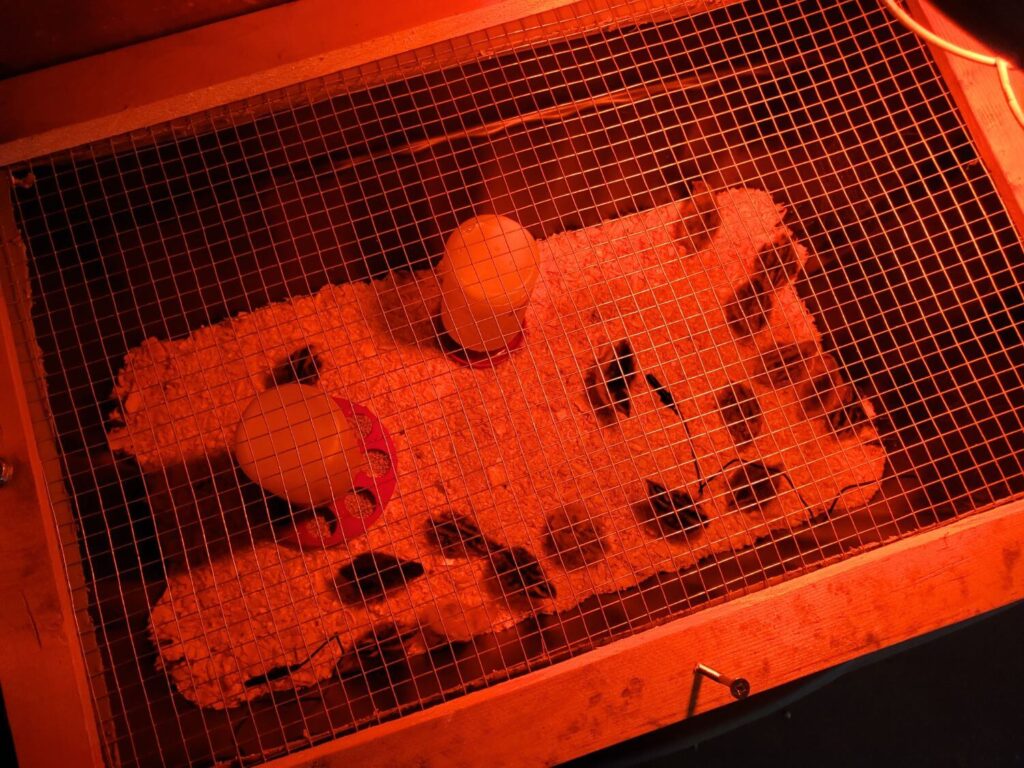
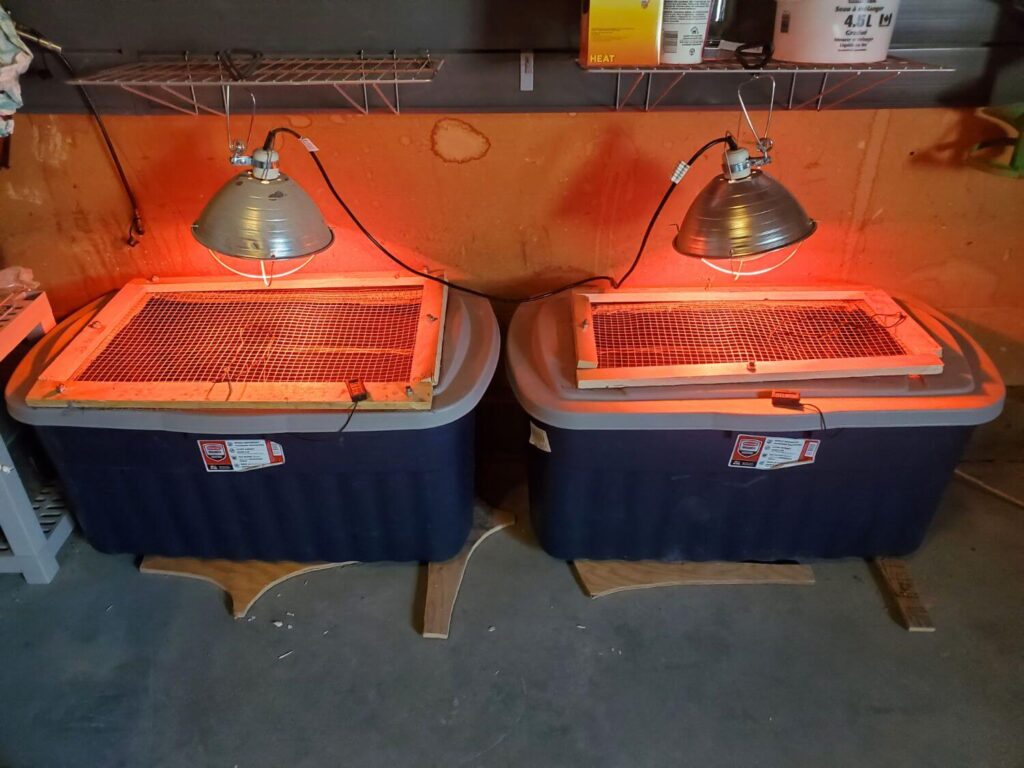
There are a number of housing options for brooders. We chose to convert 189L Rubbermaid storage totes, but you can also build a wooden brooder box or purchase a purpose-made quail brooder.
Whatever type of housing you choose, some of the features you’ll want include:
- Solid sides to minimize drafts and hold heat.
- A wire mesh top that allows for ventilation but also contains the quail chicks once they’re able to jump and fly.
- Enough room to accommodate the number of chicks you’ll have. Aim for around .5 sqft per chick. You’ll also want room to have warmer and cooler areas of the brooder to allow the chicks to move around to regulate their temperature as needed.
- Accessibility for ease of cleaning, changing out water and food, and accessing the chicks.
- Once you have the housing sorted out, some other items you’ll need for your brooder include:
- A heat lamp with an infrared bulb or a brooder plate heater. The plate heaters are pricier but are safer and pose less of a fire risk than heat lamps. If using a heat lamp, place it above the wire mesh lid as an additional safety measure.
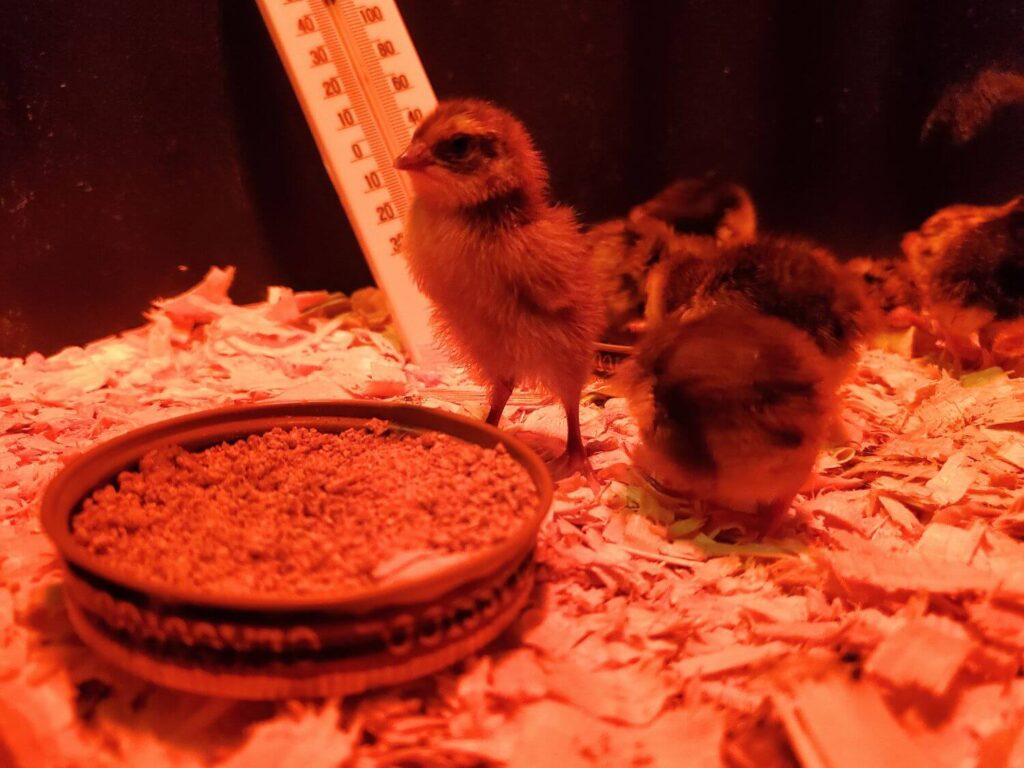
- Thermometers placed in multiple areas of the brooder. I prefer thermometers with cables so the sensors can be placed in different areas with the displays easy to read.
- Quail chick waterer or small water dish. Keep in mind that young quail chicks can drown in even shallow water. Placing marbles or pebbles in the water dish can help prevent this.
- Quail chick feeder or a dish for food. Any type of dish can be used as long as they can reach into it to access the food. Keep in mind that they will walk around in, poop on, and scratch the feed out of open dishes. Quail feeders can keep the food cleaner and better contained.
- Bedding. My preference is hemp shavings, but straw or pine shavings also work. Small chicks may have a hard time moving around on anything that is too coarse or slippery so opt for finely shredded materials whenever possible.
- You may choose to add other features to the brooder for entertainment. This could include rocks, branches, hollowed out logs, or a dust bath. I typically add these things after the chicks are a few days to a week old.
WATER AND FOOD FOR QUAIL CHICKS
Regular tap water can be used as a water source for your quail chicks. As mentioned, you’ll want to make sure the water dish does not pose a drowning risk, especially when the chicks are very young. Placing pebbles or marbles in open water dishes can help keep them safer.
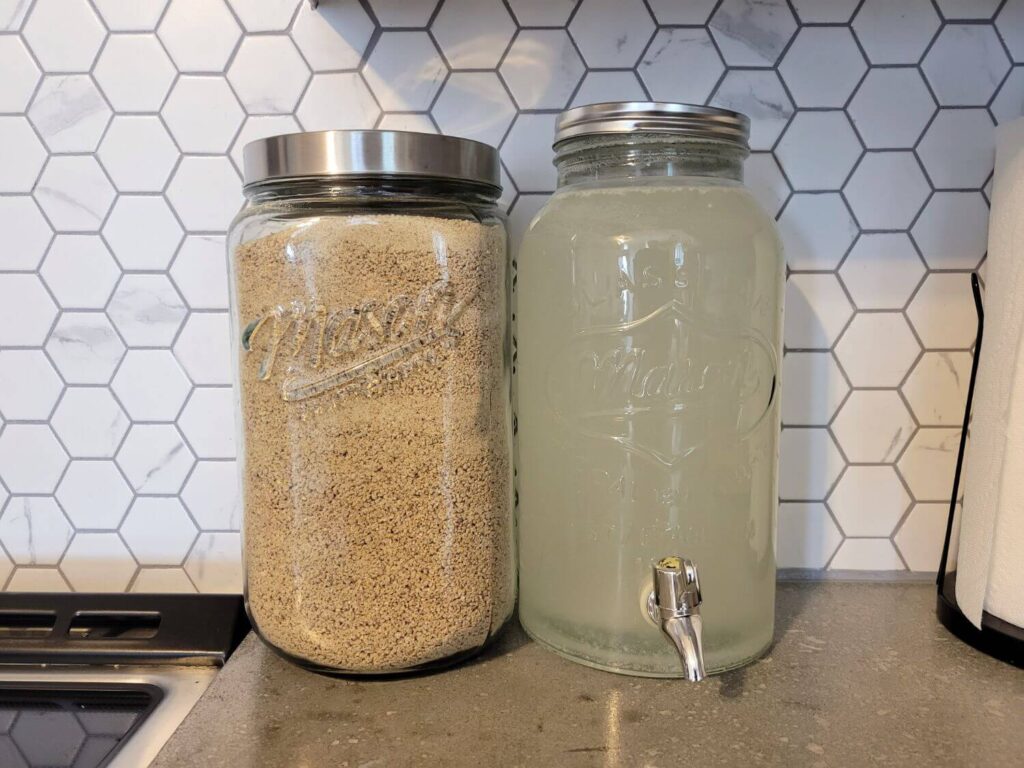
You may also to provide magic water for your quail chicks during brooding to give them a boost and help them thrive.
Magic water is simply garlic, acv, and water. It provides benefits to the chicks’ immune systems and can help reduce illness. Mix the following ingredients in a glass jar the day before you expect the chicks to arrive and allow to steep overnight.
- 4 liters/1 gallon warm water
- 30 ml/2 tbsp apple cider vinegar
- 118 ml/½ cup honey
- 2 cloves raw garlic, minced
You can provide magic water at full strength, diluted with water, or alternate magic water with regular water at each refill. I typically provide magic water for the first 5-7 days, tapering off or diluting before switching fully to plain water.
Aim for a feed with around 25-30% protein. Most turkey starter or game bird feeds will work. You’ll want a crumble as opposed to pellets, as the pellets will be too large for the quail to eat.
Some choose to grind the crumble for an even finer texture for small quail chicks. I typically grind their feed for the first couple of days before providing the crumble as is.
For those first days when the chicks are particularly small, I provide the ground feed on a paper towel on the bottom of the brooder for easy access. Once the chicks are a bit bigger, I switch to a quail chick feeder to keep things cleaner.
The quail chicks will not need a source of grit as long as you are only providing a fine crumble feed for them. If you are planning to give them treats such as meal worms or hemp seeds, it is recommended to also provide grit to help with digestion.
PROCESS AND TIMELINE FOR BROODING QUAIL CHICKS
PREP THE BROODER
You’ll want to have everything setup and ready to go before the chicks come.
- Place your brooder in a draft-free, climate-controlled location.
- Cover the bottom of the brooder with a layer of bedding material.
- Place the heat lamp or heat plate on one side of the brooder and turn it on. Place your thermometers in the brooder. Bring the temperature up to 35C/95F on the warm side of the brooder.
- Place the feed and water on the cool side of the brooder. You may want to add a solid, flat base for the feeders and waterers to sit on. A small tile or piece of plywood works well for this, just make sure everything is still accessible for the tiny chicks.
PLACING QUAIL CHICKS IN THE BROODER
If you’ve hatched your own quail eggs, you’ll want to leave the chicks in the incubator until they are fully dry and fluffed up. At that point, you can gently place them into the prepared brooder.
If you’ve sourced day-old chicks from a local supplier, put them into the brooder as soon as possible.
When placing chicks into the brooder, dip their beaks into the water and food so they know where they are and can find them again on their own.
THE BROODING PROCESS
Throughout the brooding process, the quail chicks will need to be checked on multiple times per day to ensure they are all happy, healthy, and have adequate feed and water. Water and food should be topped up and refreshed regularly. I like to wash and bleach the waterers each time I dump and refill to prevent bacteria growth and health issues.
Bedding should be changed regularly as well. Quail chicks produce a surprising amount of waste, for being such tiny creatures. You’ll want to keep things clean and control humidity by removing wet and soiled bedding.
In my homemade storage tote brooders, I typically practice a sort of modified deep litter method by adding fresh bedding to the brooders daily and then doing a full dump and wash every 2-4 days. The soiled bedding is added to our compost pile.
This of course requires that the chicks be moved out of the brooder while cleaning. I have three brooders and shuffle the chicks around to allow me to wash and thoroughly clean each brooder.
Quail chicks develop very quickly. They will start to grow wing feathers after a few days and will be able to jump or fly after about a week. Keep this in mind when removing the lid to clean the brooder or refill food and water or you might find yourself on a wild chick chase.
QUAIL CHICK BROODER TEMPERATURE
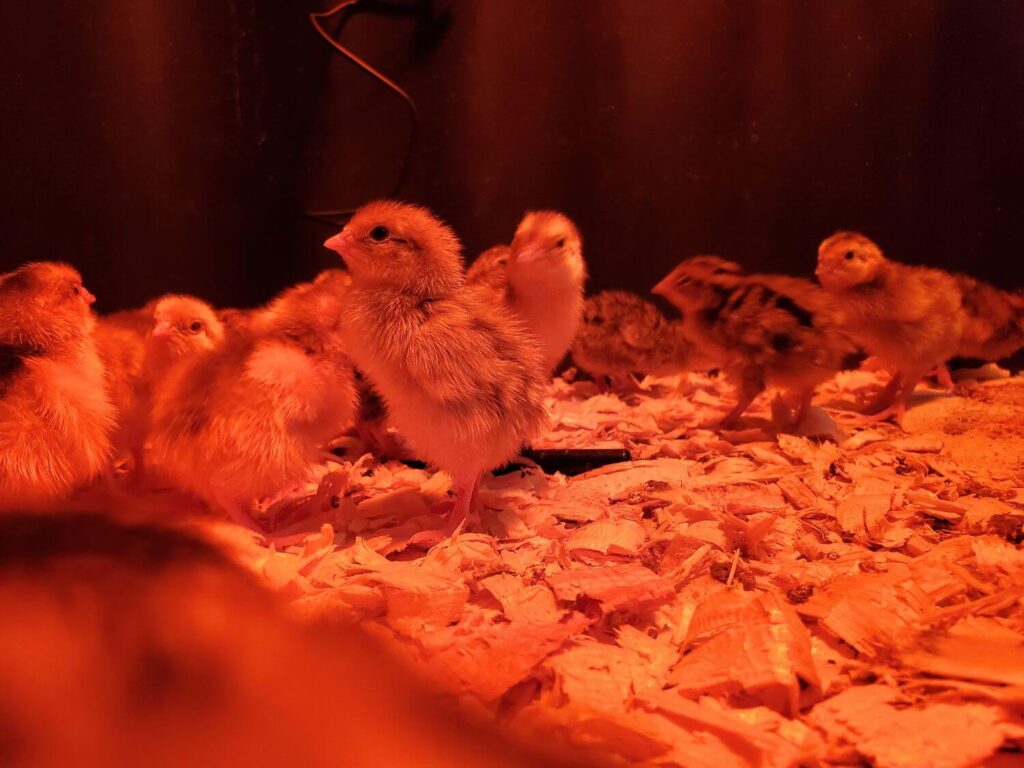
Consistent brooder temperatures are very important. You want to see the chicks spread evenly throughout the brooder, moving from the heated side to the food and water freely, and chirping softly.
If the chicks are huddled under the heat source and chirping loudly, they are too cold. If they are all standing away from the heat source, panting, or look lethargic, they are too hot. Adjust the temperature as needed to achieve an active and balanced brooder.
You’ll want to start with the warm side of the brooder around 35C/95F for the first week, dropping the temperature by about 5 degrees per week as the chicks age.
By 4 weeks, the quail chicks should be fully feathered and able to handle room temperatures. At this point, the heat lamp or plate can be turned off.
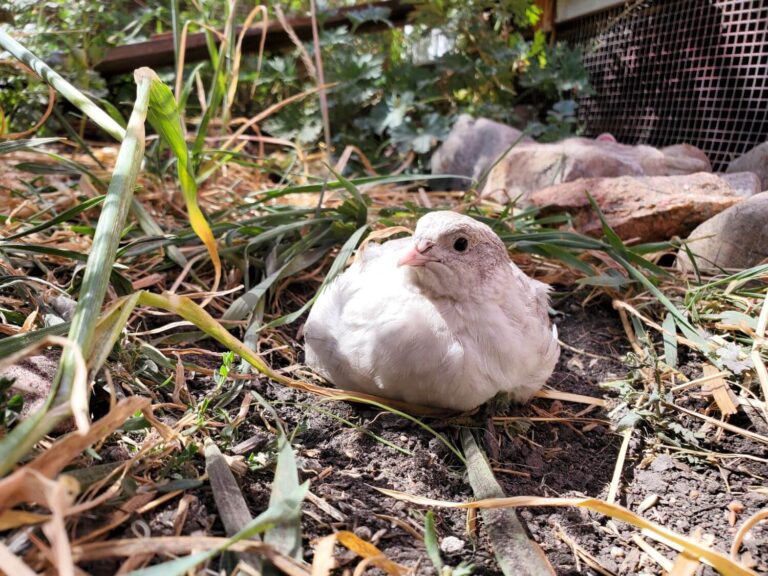
MOVING JUVENIELLE QUAIL TO THEIR PERMANENT HOME
The process of moving your fully feathered, juvenile quail out to their permanent home will vary a bit depending on the environment you are moving them to and whether or not you have an existing flock of adult quail.
The quail will typically be ready to move out by around the 4-week mark, particularly if they are going to a space that is climate controlled or if the weather is on the warmer side. If they will be moving to an area with variable weather conditions and more exposure, you may want to keep them in the brooder until 5-6 weeks of age.
Quail can typically also be feather or vent sexed by 4 weeks old. Before moving them out of the brooder, you’ll want to do this to ensure you have an appropriate male-to-female ratio. Leg bands or these tiny coloured zip ties can be used to indicate sex and age, if desired. Of course, just be sure not to tighten them too much and allow room for them to grow.
Our quail have access to a coop as well as a large, enclosed outdoor aviary. When I move juvenile quail out, I typically lock them in the coop for the first day or two to ensure they have found their food and learned how to work the nipple waterers.
Once I’m confident they have everything figured out, I will open the doors on the coop so they can access the outdoor area. I find that if they have access to the outdoors immediately, they will just spend all their time outside and not bother going inside the coop to find their food.
If your quail housing is a smaller enclosure or coop, you can skip this step of containment and let them have free reign right off the bat.
If you have an existing flock of adult quail, moving your juvenile birds out will take a little more effort on your part. Like most poultry, quail have a pecking order and mixing adults and unknown juveniles can result in fighting and general chaos.
Before mixing an existing flock with new birds, you’ll want to separate an area with mesh to allow the two groups to see each other and get used to each other but not have access to one another. After 1-2 weeks, you can mix them together and just keep an eye on them to make sure everyone is adjusting well.
PROBLEMS YOU MAY ENCOUNTER WHILE BROODING QUAIL CHICKS
Unfortunately, brooding quail chicks is not without potential problems. Below, you’ll find some of the more common issues that you may run into and ways you can help prevent or address them.
THE BROODER IS TOO HOT OR TOO COLD
Temperature control is an extremely important aspect of brooding quail chicks. You’ll want to keep an eye on the activity in the brooder to help determine if it is too hot or too cold for the chicks and adjust accordingly.
You want to see active, lively chicks that are spread evenly and moving happily throughout the brooder. If they are all huddled under the heat lamp or plate, it is too cold. If they are trying to get away from the heat source and panting, it is too hot.
Always go by the behaviour of the chicks when adjusting brooder temperatures, rather than simply setting it where it “should” be. If you are unable to maintain consistent temperatures in your brooder, you may have to consider moving it to a location that is more climate controlled or has less drafts.
SICK CHICKS
Quail chicks are quite fragile and are susceptible to a number of illnesses such as pasty butt, brooder pneumonia, and coccidiosis, among others.
While some diseases are not preventable, there are steps you can take to minimize the risk to your quail chicks.
- Ensure your brooder has adequate ventilation. Never place a solid lid on the brooder.
- Use only mould-free bedding material.
- Clean the brooder regularly to remove soiled bedding. This is one benefit to having multiple tote brooders available, which allows for thorough cleaning and disinfection.
- Regularly clean the feeders and waterers as well. Wash and disinfect at each refill.
- Always have fresh water available to avoid dehydration.
- Minimize exposure to people and other animals until their immune systems have developed.
- Check on the chicks regularly and note any unusual behaviour which could indicate an issue.
SPLAY LEGS OR DEFORMITIES
Splay leg is a common issue seen among all types of poultry chicks and quail are susceptible to it as well. You may on occasion also see other deformities in beaks, legs, and wings.
Depending on the situation, you may be able to use tape or cut up band aids and cardboard to create supports or tiny splints to help correct splay leg.
Of course, it’s always preferable to prevent it in the first place. The best way to do this is to ensure the surface of brooder floor is covered with a fine bedding material that is easy for them to walk on and not slippery.
FAILURE TO THRIVE
As unfortunate as it is, there are times when a chick may simply fail to thrive with no apparent reason or anything that can be done to help them.
If you have a chick that is struggling, you can try things like magic water or supplementing with electrolytes to give them a boost.
However, it is also important to know that illness and death are an unavoidable part of raising animals and there may be times that you’ll have to deal with that scenario if and when it arises.
AGGRESSIVE CHICKS
It may be hard to believe but these cute little fluff balls can at times be very mean to their brooder-mates. Watch for aggressive behaviour, such as chasing and pecking.
To help prevent this, ensure you have adequate room in the brooders for the number of chicks you’re housing. At least .5 sqft per bird is recommended.
Constant lighting with no periods of darkness can also affect behaviour. This is why you’ll want to use an infrared bulb if using a heat lamp as regular light bulbs can cause issues.
In the rare event you still have an aggressive chick, we have found that isolating them for a few hours in their own separate space before returning to the group typically corrects the problem. Basically, they need a time out.
If you are planning to brood quail chicks, I hope this article was helpful! I am (obviously) a fan of quail and have written a number of other articles to help anyone looking to get into these quirky and fun birds:


i wish I would have found your info sooner. I lost a lot of baby quail from my stupidity. I am raising just to try and increase the count around my place. I love to hear them in the morning and early night. I feed the wild quail via auto feeders and just thought it might help increase the population and quail music. I don’t mow or bush-hog a certain 5 acre spot under the pines and always see a hen with her little ones scooting around. Have a good day. thanks for the info. Before I do another 100 chicks I am going to convert a couple of horse watering troughs to brooders like your set up
David, try to put, before you start brooding quail eggs, 3 days earliera few bantam hen eggs.
The chicken chicks will help you raising the quail WAY easier.
That is how I do it since ages, and it works betteras pampering them.
Also, if you use a reptile ceramic heater”lamp” they get a day/night time scheme that helps them too
Good luck with yournew batch
Hi Laura,
Have you ever tried to put a bantam chick between your quail chicks ?
I know it needs some planning, but if you do so you will encounter way less problems in raising the quail chicks.
Chicken chicks are, weird enough, more up to take care for themselves.it reflects on the quail chicks when you let them grow up together.
I hope you will have an even better result if you try this.
God bless. Jacob
My first eighteen quail chicks will hatch in about four days. I have a porcelain heat bulb…. so no light , but they will be in a room with about 12 – 14 hours of daylight, is that satisfactory?
Yes, natural daylight is perfect!