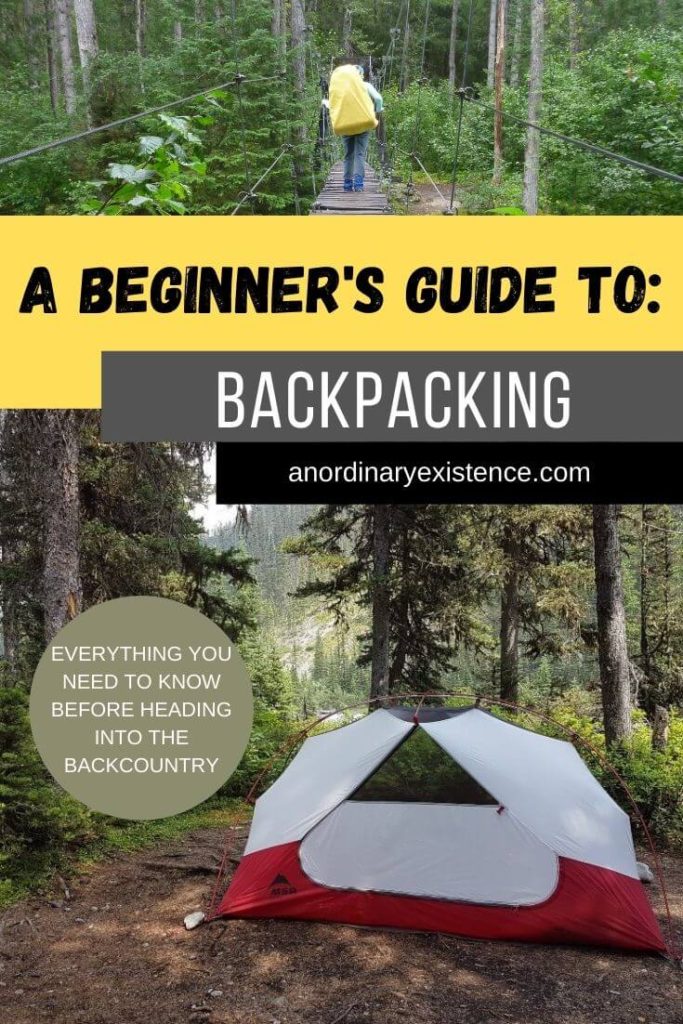
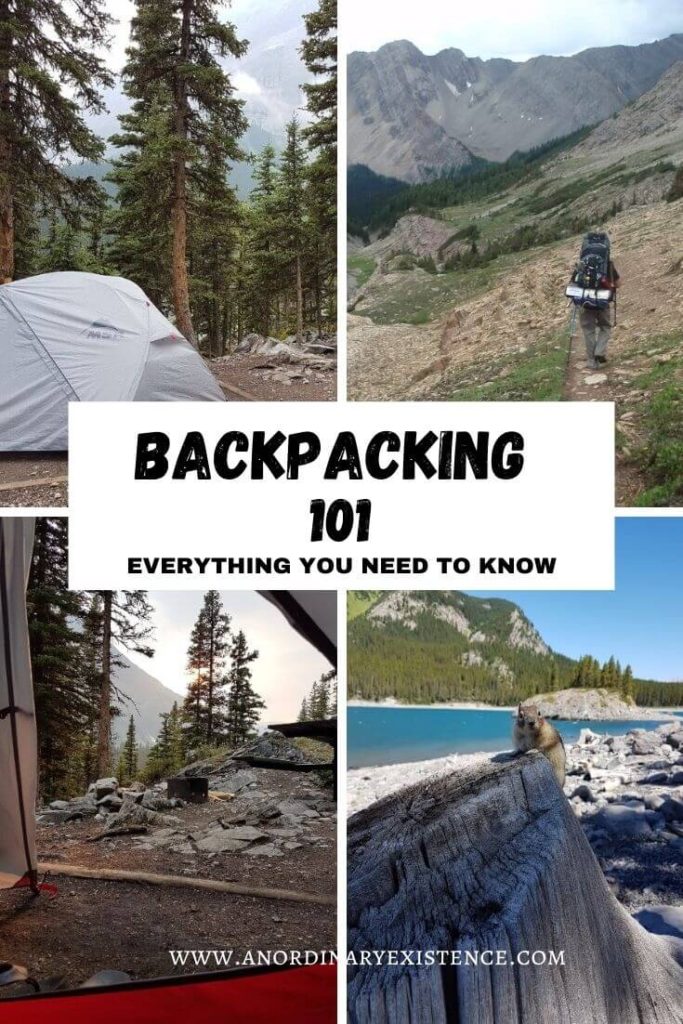
A BEGINNER’S GUIDE TO BACKPACKING
Want to try backpacking for the first time? Check out my tips, tricks, and gear recommendations for backpacking newbies!
There are a million things to think about when undertaking a backpacking trip. Food, water, trip planning, gear choices, safety considerations… These are just a few things that are suddenly on a whole new level when you go from day hikes to overnighting in the backcountry. But there’s no need to let it overwhelm you! With a little research and prep, you’ll be on the trail in no time.
This post may include affiliate links. As an Amazon Associate I earn from qualifying purchases. Find more info in my privacy policy.
Read on to get my best advice on backpacking for the first (or 100th!) time.
WHY YOU SHOULD TRY BACKPACKING
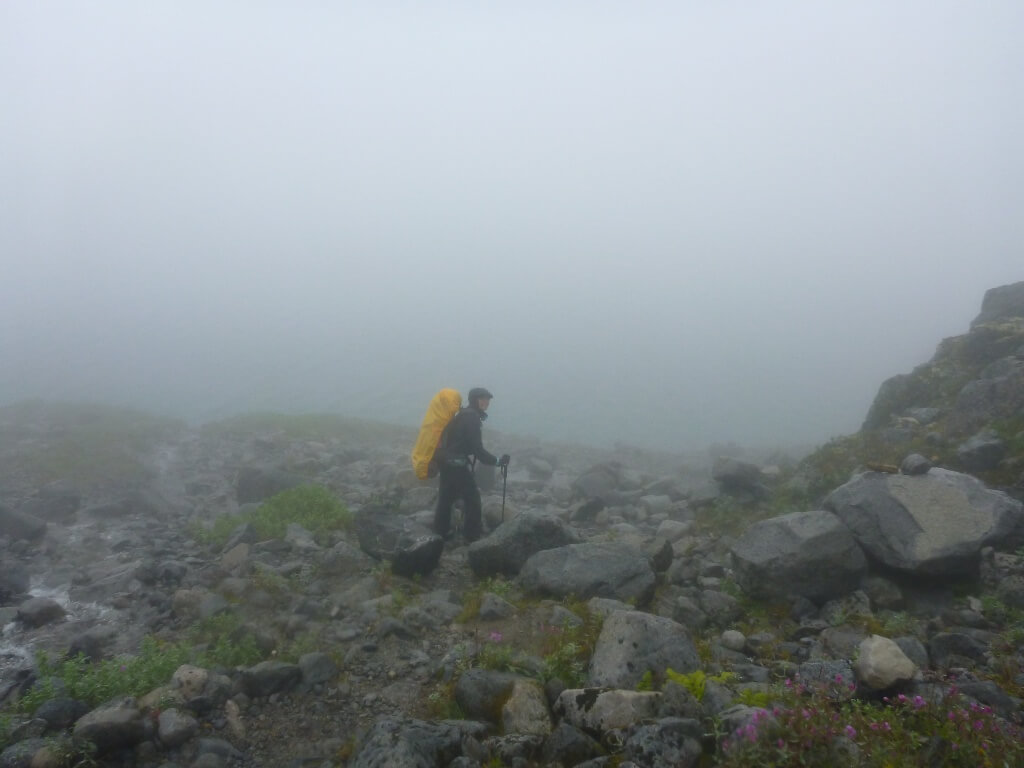
Day hikes are great, but backpacking can open up a whole new outdoor world for us nature lovers. Spending multiple days on the trail allows us to get further away from civilization and really immerse ourselves in off-grid life for a few days – which has some seriously awesome effects on the human brain.
Studies on the 3-Day Effect suggest that getting away for a long weekend (or more) can help “reset” our frontal cortex, allowing other areas of the brain to step up and improve our performance on thought tasks.
On top of that, backpacking allows us to see places we couldn’t otherwise access, can get us further away from the crowds, and totally changes the way we interact with nature.
Plus, the satisfaction that comes with being totally self-sufficient for an extended period just plain rocks.
Backpacking may not be for everyone, but if you’re thinking about doing it, I highly recommend giving it a go!
WHAT TO EXPECT WHEN BACKPACKING
In the most basic sense, backpacking = carrying everything you need to survive in a pack on your back + staying overnight in the backcountry.
Every backpacking trip will be unique based on the terrain you hike, the difficulty of the trail, the type of backcountry amenities available, your packing style, and about a million other factors. You could do short daily distances along a well-marked trail to camping areas with huts, outhouses, and water sources. Or, you could do long, challenging days of off-trail travel while wild camping.
How you choose to backpack will be based on your skill level, comfort level, physical abilities, and personal preference. I suggest starting out with the former to get a good feel for what it’s like before levelling up to more challenging trails.
Whatever type of trip you end up doing, backpackers can generally expect to give up luxuries like running water and electricity, be self-reliant, and be prepared to deal with whatever mother nature decides to throw at you (like horrible weather or viscous chipmunks).
THE BIGGEST DIFFERENCES BETWEEN DAY HIKING AND BACKPACKING
If you’re currently an avid day hiker, you may be wondering what the main differences are between that and backpacking. Here are what I consider to be the most significant differences between the two:
Backpacking requires more planning and prep. Backpackers will have to familiarize themselves with terrain, routes, trail hazards, and rules and regulations beyond what you would for a day hike. The longer the backpacking trip, the more information you’ll have to gather.
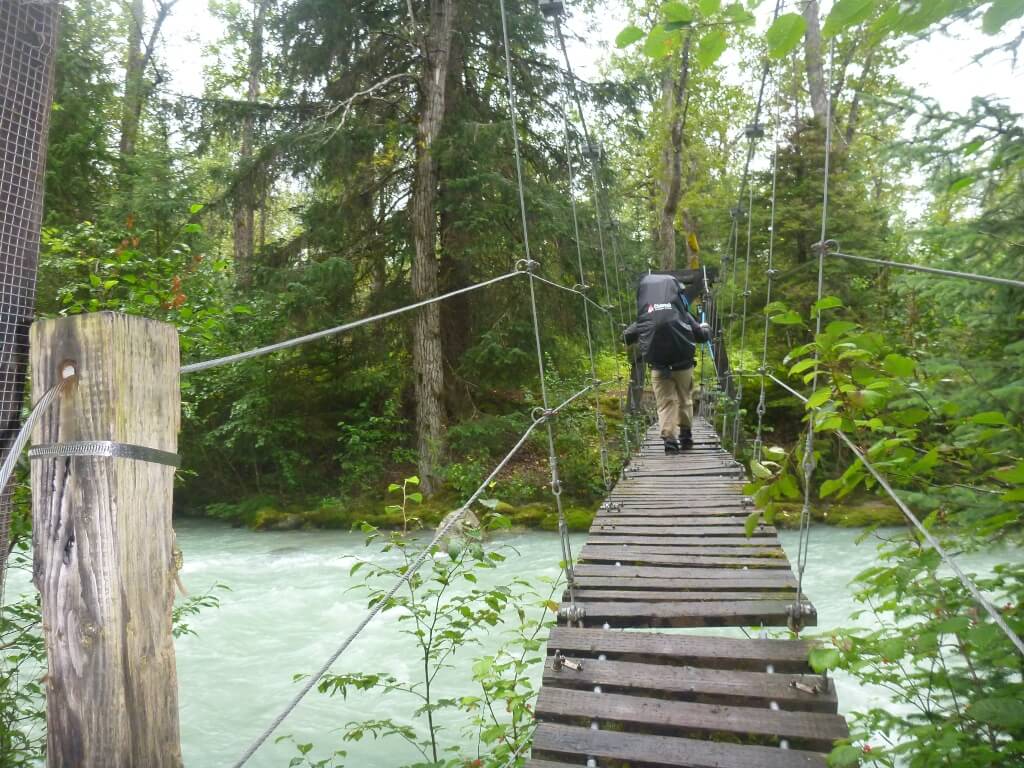
Backpacking requires you to carry all your gear, food, and water for the duration of the trip. The extra weight of a backpacking pack makes a huge difference in your hiking experience.
Backpacking requires that you go days without conveniences. Access to things like power, showers, restaurants, cell service, etc., will be limited or nonexistent. Day hikers usually have access to these amenities once they’re off the trail for the day.
Backpacking requires additional tasks to be performed in the backcountry. Think: setting up camp, cooking food, sourcing and filtering water, basic hygiene, etc.
PLANNING YOUR BACKPACKING TRIP
Alright, now that you’re familiar with what backpacking is and why it’s so awesome, here are some tips and tricks for planning your adventure.
PICKING A TRAIL AND PLANNING YOUR ROUTE
I always recommend that people first figure out the “why” behind wanting to go backpacking before choosing a trail. What is it you’re looking to get out of the trip? Do you want to take in spectacular views? To explore a coastline? To challenge yourself? To simply wander through the woods for a few days? Once you have an idea of what you want, it’s much easier to start narrowing down a list of potential trails.
I also recommend you start small with your first trip. This will be when you really get a chance to test your gear, ability, and whether or not you even enjoy backpacking. Committing to a week-long trudge right off the bat might not be the best idea. Instead, choose a trip you can do over a long weekend for the first time out and work up from there.
If there’s a trail or region you’re already familiar with from day hikes, that can also be an excellent place to start. Going somewhere you know the terrain, weather patterns, and wildlife can significantly increase confidence for a first-timer.
If there isn’t a place you’re familiar with, or if you’re just looking to head out somewhere new, I recommend choosing a popular, well-used trail if possible. These trails will generally be better marked, have more information available while planning, and may have backcountry amenities such as designated camping areas, outhouses, firepits/picnic tables, etc., that more remote trails don’t. These features can take a lot of the guesswork out of some of the more challenging parts of backpacking, such as navigation, choosing an appropriate camping spot, and Leave No Trace practices. Popular trails will also be more likely to have other people around, which can make many first-time backpackers more comfortable.
Regardless of the type of trail you choose, having more information available before heading out will make you feel more confident. Popular routes and trails within national and state/provincial parks tend to have useful info that is readily available online or by contacting the park. This is a great place to start when choosing a trail.
READ MORE: 5 THINGS YOU SHOULD DO BEFORE EVERY OUTDOOR ADVENTURE
THINGS TO CONSIDER WHEN CHOOSING A TRAIL FOR BACKPACKING
Below, you’ll find a list of some of the things you’ll want to consider when researching trails:
Terrain/Difficulty/Skills Required – Keep in mind that you’ll be carrying a heavier pack when looking at distances and elevation gains/losses. Also, watch for elements that may push you too far outside your comfort zone or skill level, such as stream crossings, exposure, route finding, or technical sections.
Weather Patterns/Best Time to Go – Most trails will have seasons that dictate the ideal time to go. Within that, you’ll also want to consider weather patterns such as daily high/low temperatures and potential for rain/snow/storms.
Wildlife – Check into what types of wildlife inhabit the area and if there are any special considerations for backpacking there, such as practicing bear safety. The peak season for insects is another thing to think about. If it’s possible to avoid the onslaught of mosquitoes or black flies, you’ll be glad you did.
Distance/Time Required – Again, expect your pace to be a bit slower with your full pack on and factor in your current ability when looking at daily distances and the overall time required to hike a trail.
Rules/Regulations – Are permits required? Are open fires allowed? Are there limits on group sizes? Do you have to reserve your backcountry camping spot ahead of time? Are bear canisters required? There can be many trail-specific rules and regulations that may or may not be a deal-breaker, so don’t forget to factor those in while planning.
Amenities/Features/Remoteness – Are there water sources along the trail? Will you have to filter/treat your water? Are there designated camping areas, or will you have to choose your own sites? Are there outhouses? Huts? Bear Lockers? Is there cell service or a way to contact authorities in an emergency? All of these factors will impact how you plan, prep, and pack for your hike. The more information you can gather ahead of time, the better.
Logistics – Is it a loop or out-and-back hike? Are there multiple access points? Will you need to leave vehicles or arrange a shuttle? Is there overnight/long-term parking available at the trailhead? Are there accommodation options for before/after the hike if needed? In some cases, things like shuttles and accommodation may need to be booked well in advance, so it’s best to find this out early in your planning phase.
WHERE TO FIND INFORMATION WHILE PLANNING A BACKPACKING TRIP
Information is power when planning a backpacking trip, so you’ll want to take some time to find good quality, reliable resources.
Start with the park or trail management organization if there is one. Most trails that fall within park boundaries will have a significant amount of information available through the park’s website or by contacting the park office. This is also the best place to find the most accurate info on rules and regulations as it will be coming from the body that sets these things. Trails that are not maintained by an official park are often managed by an organization that will have similar info. These tend to be the most up-to-date and knowledgeable sources of practical information.
Local or regional tourism organizations may also have resources on trails in their area or may be able to point you in the direction of the trail management org if you are having trouble locating them.
Local outfitter shops are another great place to check. Even if they don’t have official resources available, staff may be familiar with the trail and are usually happy to share their knowledge and experiences with you.
Another good way to find info is by finding blog posts written by people who have hiked the trail. The benefit of blog posts is that the information is often based around the author’s personal account, which, while subjective, can give a more in-depth picture of what the trail is like. They’ll often include opinions and quirky anecdotes that you won’t find on official websites.
A web search will likely also turn up trail reports on sites like All Trails, Hiking Project, and local trail-finding sites. These usually have basic information on the hike and places for people to post their reviews and experiences of the trail. They can be a useful source of information.
HOW TO STAY ORGANIZED WHILE PLANNING A BACKPACKING TRIP
Feeling overwhelmed yet? There is a lot of information to find and keep track of during the planning phase. If you’re having trouble keeping your notes organized, I highly recommend using online tools to help. The biggest benefit of digital planning is copying and pasting links to websites, maps, and other information that you can quickly and easily access when you need to reference it.
Sites like Trello or Toggl Plan allow you to break down your trip into various boards that you can organize in a way that works best for you. A simple Word or Google doc will also work. Just create headings for the various things to consider and plug in your notes below. Setting up a trip-specific Pinterest board is another great way to keep all your links in one place, but I prefer options that allow me to add my own notes, questions, and to-do lists all in one spot.
MAKING A TRIP PLAN
A trip plan is a document you put together with all the relevant information about your trip. You’ll then give your trip plan to a friend or relative who you trust. Their job will be to get that information to the appropriate bodies if something goes wrong and you don’t return as planned. It’s often common for backpackers to also leave a copy of their trip plan under the driver’s seat in the vehicle they leave at the trailhead.
Here’s what you should include in a trip plan:
Who is going. Names, ages, emergency contact info, medical conditions, and allergies of all group members.
Where you’re going and what you’re doing. The location and the detailed route/itinerary you plan to hike. Also, include the location you plan to leave a vehicle(s) and a description with colour, make, model, and licence plate number.
When you’re going. The departure date/time, the planned return date/time, and the time you expect to make contact. Also, include the date/time you’d like them to contact authorities if you haven’t been in touch. Often, people will allow a window of time to allow for unexpected mishaps or delays that aren’t emergencies. For example, say you plan to return to the trailhead on Saturday at 4pm; you might set Sunday at 8am as the time you’d like them to put in the call.
Contact information for local authorities. This may be a parks office, land manager, or search and rescue organization. Make it as easy as possible for your trip plan holder to get you help if you need it.
Gear list. It is helpful for authorities to know what type of gear you have with you. Include the colour of larger or brighter items like tents or jackets, which could help them locate you.
HOW TO PREPARE FOR A BACKPACKING TRIP
Alright, so you’ve chosen a trail, gathered all your info, and have a plan in place. Now it’s time to prep.
GATHERING THE GEAR YOU’LL NEED FOR BACKPACKING
Because you’re overnighting in the backcountry, backpacking requires significantly more gear than day hiking. In addition to your 10 essentials, you’ll need everything to keep you warm, comfortable and well-fed on the trail over multiple days. Below, you’ll find a breakdown of various categories of items, things to consider when choosing your gear, and examples of what I use in the backcountry.
BASIC BACKPACKING GEAR
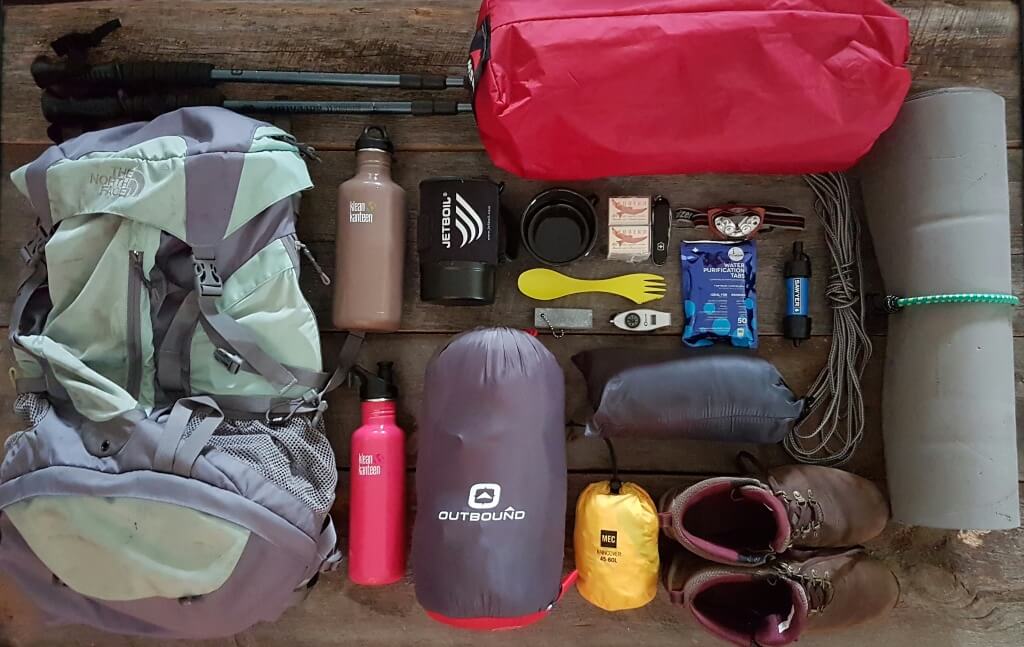
Basic backpacking gear includes your ‘big three’ (backpack, shelter, and sleeping bag), which will likely be your heaviest and most expensive items. Renting these essential pieces for your first few trips can be a great way to test out options before investing in what works for you. A few extra items round out this category and create the foundation of your backpacking kit.
The Backpack – Choose a pack that is large enough to fit what you need but not so big that you’re tempted to throw in the kitchen sink. Volume requirements will vary based on packing style and the conditions you’ll be backpacking in, but I’ve found a 50-litre bag is about right for me. I started out with a North Face Terra 40, which wasn’t quite big enough, and now I currently use the Osprey Sirrus 50. When choosing a pack, some things to consider are volume, torso length, the weight of the pack, and overall fit for your body. If possible, I recommend testing out packs in-store and being properly fitted.
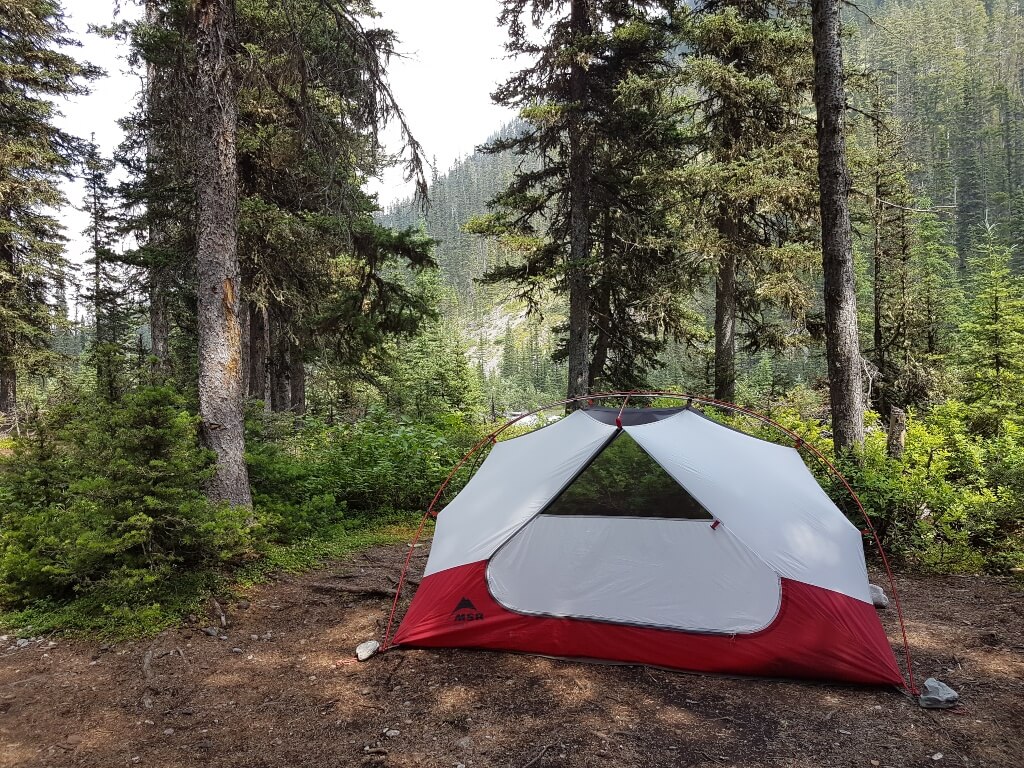
The Shelter – Your shelter options for backpacking include a tent, hammock, tarp system, or bivy bag. Each option has its pros and cons. Terrain, weather, local regulations, personal preference, and budget will all impact which shelter type you end up deciding on. Do some research and ask your outdoorsy friends (or strangers!) for their recommendations. I personally prefer the “home away from home” feel of a tent. We currently use the MSR Elixir 2 when it’s just the two of us and the MSR Zoic 3 when we have the dogs along. Tenters may also want to carry a groundsheet to provide an extra layer of protection from the ground.
The Sleeping Bag – Weight, warmth, and cost will be the determining factors for your choice of sleeping bag. Down-filled bags weigh less and pack down smaller than synthetic. But synthetic will keep you warm even when it’s wet, down won’t. Temperature ratings are provided on sleeping bags so you can choose based on the weather, but keep in mind that these are the temperatures at which the bag will keep you alive, not necessarily comfortable. If you run cold, go for a warmer bag. You can also increase the warmth factor when needed with sleeping bag liners or by wearing thermals to sleep. We use our old Hillary +5C bags for warm weather trips and Hotcore R-200 -10C bags for cooler conditions. Both are synthetic because there’s basically a rule that it will rain when we go backpacking, and the thought of a cold, wet down bag doesn’t sound fun to me.
Sleeping Pad – Sleeping pads provide comfort and keep you warmer by insulating you from the ground. The higher the R-value, the more insulation it will provide. The three basic options are inflatable, self-inflating, and closed-cell foam pads. Inflatable pads are light and pack small but can be prone to damage. Self-inflating pads generally have an open-cell foam layer and offer a higher comfort rating but are often bulky and heavier. Closed-cell foam pads are lightweight and durable (no need to worry about holes!) but do take up space. We started with simple thin foam pads that we bought about a million years ago (similar to this). I recently purchased a Therm-a-Rest Z-Lite pad that folds up nicely and attaches easily to the outside of my pack.
Pillow – Hardcore ultra-lighters consider pillows a luxury item for backpacking, but I find that a good night’s sleep is necessary when I’m on the trail, and I’ll give up the bit of space/weight for the increased comfort. Backpacking pillows come in all sorts of stuffable and inflatable configurations. We have simple small pillows that pack down in their own stuff sacks. They take up a bit too much room for my liking, but they work, and I haven’t been motivated to replace them just yet.
Headlamp – Having a light source around camp is essential, and headlamps are the handiest way to provide that. They offer hands-free and mobile light that can go from tent to trail to late-night bathroom breaks. When looking for a headlamp, remember that the number of lumens will determine the amount of light it puts out. You can get battery-powered or rechargeable options. If you opt for battery-powered, don’t forget to take extras. If you go for a rechargeable one, charge it up before you head out and take along a battery bank/charging cord to top it up on the trail. We use the rechargeable Biolite 330 and take along their Light Diffusing Stuffsacks, which convert the headlamps to lanterns for when you want ambient lighting.
Trekking Poles – Trekking poles can help distribute weight, add stability, and take pressure off your knees. They can double as supports for a tarp system or as a crutch or splint in the case of injury. They come in carbon (super light but less durable and more expensive) and aluminum (heavier but more durable and less costly) and can be telescoping or folding. When looking at trekking poles, consider their weight, packed-down size, and the comfort of the handgrip.
Rope/Cord – Having a length of lightweight paracord can be useful for several reasons in the backcountry. Make a clothesline to dry out your wet gear. Use it to tie your tent off to a wooden platform. Secure a tarp over a cooking area when it’s raining. Use it for a bear hang if you don’t have another safe food storage option. Etc., etc., etc.
READ MORE: THE 10 ESSENTIALS FOR ANY OUTDOOR ADVENTURE
GEAR FOR COOKING, EATING, AND DRINKING
Staying well-fed and hydrated on the trail is so important. Not only will it help fuel your body, but it will also help stave off the irritability and mood swings that those of us prone to hangriness tend to experience. Backcountry cooking can be as simple as you want it to be (literally, just boiling water) or can be a gourmet event. The gear below will provide you basic kitchen kit, but you may need to tailor it to your cooking style and needs.
Camp Stove and Fuel – Don’t rely on cooking over an open fire. Many trails have regulations and restrictions on campfires, there may be bans in place depending on the weather, or it could pour rain the entire time you’re out there. Always take along a camp stove and fuel. There are some great small and lightweight options like MSR’s popular Pocket Rocket. Another option is to use a cooking system that incorporates the fuel, burner, cooking pot, and other accessories into one kit. These are especially efficient for those of us who prefer quick and easy just-add-water dehydrated meals. We use the Jetboil Zip system for our adventures.
Cookset – If you opt for a basic camp stove, you’ll need a cookset to go with it. A pot is the best place to start, but you may want a skillet as well, depending on your cooking style. Look for durable and lightweight options with a capacity that suits your needs.
Utensils – There are endless lightweight and reusable utensil options for backpackers. You may choose to go with a set that includes a spoon, fork, and knife, or get it all in one with a spork. That is basically all you need for simpler menus. For gourmet chefs, a good knife, lightweight spatula, and a longer-handled spoon may come in handy. We use the Light My Fire spoon/fork/knife combo for our simple fare.
Cups and Dishes – This is another area where you’ll want to look for multi-functional options. You can use camp dish sets that include plates, bowls, and cups, but I find the less I have to carry, the better. I usually take along a large enamelled tin mug which can be used as a noodle bowl or a coffee cup, among other things. Our eat-from-the-bag style also negates the need for multiple dishes, but if you need room to prep or portion out food, a set will come in handy.
Food – As you have probably grasped, I tend toward quick, easy options and rely heavily on dehydrated meals when backpacking. The pre-packaged backpacking meal industry has exploded in the past few years, and there are now options for basically anything you could wish for. There are keto meals, vegan meals, and meals from every cuisine you could imagine. Shop around and test a few to find your favourites. You can also DIY your own dehydrated meals, find backpacker-friendly foods at the grocery store, or go old school and schlep around tin cans of beans. Whatever your style, remember that you’ll have to pack out all your trash, so it’s a good idea to pack as simple as possible. You’ll also want to take an extra day’s worth of food, just in case you unexpectedly get stuck out there. In addition to warm meals, you’ll need snacks and easy on-the-go foods for when you want to keep moving.
Here are a few options of what I tend to take along:
Breakfast: Instant oatmeal, energy bars, dehydrated breakfast meals, instant coffee, tea
Lunch/Snacks: cured meat, hard cheeses, tortillas (perishables like this tend to keep for a day or two on the trail, depending on conditions), trail mix, energy bars, candy, beef jerky, dehydrated fruit
Dinner: dehydrated meals (cause I’m lazy at the end of a long day of hiking y’all)
If you want some DIY meal inspo, check out Fresh Off the Grid. And for the more numerically inclined, use Backpacker’s Calorie Calculator to make sure you’re packing enough.
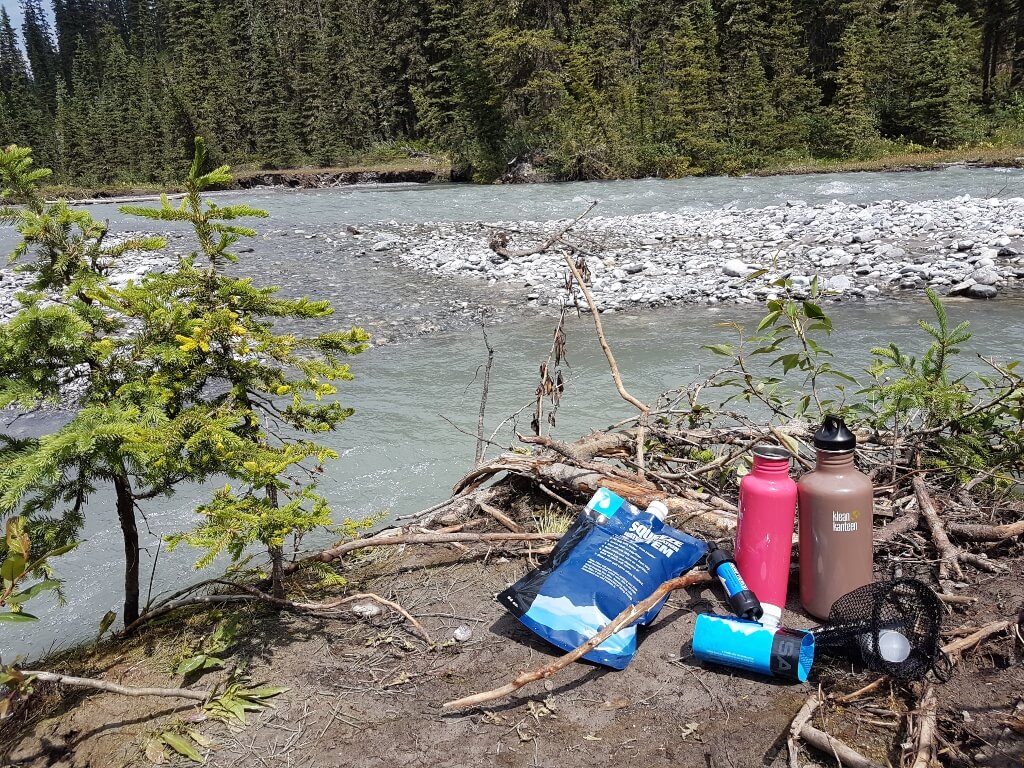
Water Bottle/Reservoir – Convenient and transportable water storage is essential. In the planning stages, you should find out if water sources are available along the trail and thus how much water you need to carry at a time. Even if water is readily available, remember that filtering/purifying water takes time. You’ll want to be able to do this in batches and have a good amount of potable water available at all times. I like to have 3-5 litres of water storage capacity per person, but this will depend upon many factors such as weather, conditions, elevation gain/difficulty, etc. We use Platypus reservoirs and collapsible water pouches, and standard metal Klean Kanteen water bottles for our water storage.
Water Filter/Purification – You likely won’t be able to carry the full amount of water you’ll need for a multi-day trip, so purification on the trail will be necessary. Your options are to filter, boil, UV purify, or chemically purify. Each method has its pros and cons, and we’ve tried all but UV. Boiling takes a lot of fuel, extra time (to allow the water to cool), and the need for a large pot to boil a decent amount at a time. Chemical and UV purification can be simple with the right product, but you should be familiar with what you’re using and how it works (i.e. you’ll have to get the ratio of purifier to water correct with tablets and drops). Filters come in many forms and vary in their ease of use, cost, what they filter out, and size/weight. Some prefer to pre-filter before boiling or purifying to get the floaties out. If you are hiking somewhere that water-borne pathogens are a considerable concern, it may be worth it to double up on your methods. We’ve been using Sawyer filters for years now, and they are my go-to option. I also carry purification tabs as a backup in case the filter ever fails.
Clean-up Kit – You’ll need a few items for your post-meal cleanup routine. The basics would be a dishcloth, small towel, biodegradable soap, coffee filters, and a garbage bag to store your trash. Use the coffee filter to strain your dishwater so you can pack out food particles and then place all trash in your garbage bag (filter, leftover food, food packaging). I find resealable food packaging (think: a large bag from frozen fruit, etc.) handy to take along and use as a garbage bag. Ziplocs work, too, but reusing something that would end up in the trash anyway is always a bonus.
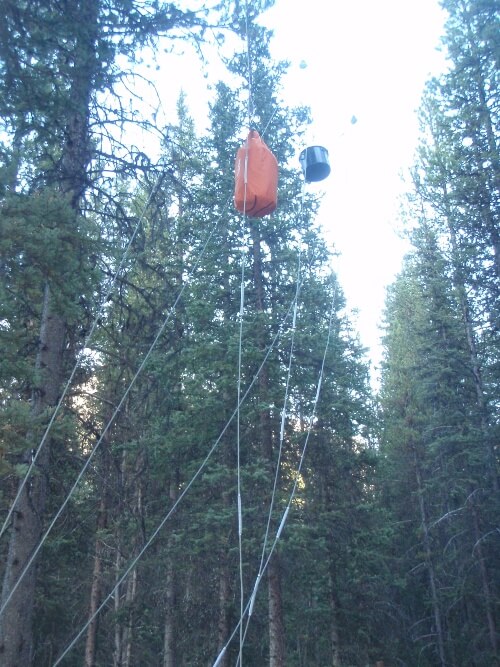
Storage – When thinking of food storage, think about packability and safety. Bear canisters can work against bears and other critters like mice and squirrels, which may be a more significant risk depending on where you’re hiking. The downside would be their weight and bulk. We backpack mostly in places with provided bear lockers or safe hang sites for food bags. Because of this, we use a 20L dry bag to store our food (and anything else with a scent). This not only keeps everything organized and together, but it also keeps our cache dry if it happens to rain overnight.
CLOTHING AND FOOTWEAR FOR BACKPACKING
The specific clothing and footwear you choose to backpack in will largely depend on your personal preferences and the conditions you’re hiking in. Still, I wanted to share a rundown of the basic items that you’ll want to consider taking along. The only real rule with backpacking clothes is that cotton kills. Instead, look for lightweight, quick-dry, moisture-wicking materials that won’t drain your body heat when they get wet. You probably already have this in your closet. Layering will help keep you comfortable and provide the opportunity to shed/add layers as you warm up/cool down or as the weather changes.
Socks, Undies, and Bras – Some may say I overpack, but I recommend a fresh pair of socks and undies for each day on the trail. I also keep a warm thick pair of socks for in the tent at night. These never get worn during the day to ensure they stay dry. I generally take one or two (depending on the length of the trip) sports bras for hiking and a comfy bra or tank with a shelf bra for around camp in the evenings.
Base Layer (top/bottom) – This is the layer that goes right next to your skin after your undies. Depending on the temperature, this can be shorts/tank, leggings/t-shirt, pants/long-sleeved shirt, or thermals.
Mid Layer (top/bottom) – This would go over your base layer and would likely be a pair of pants and a long-sleeved top.
Outer Layer (top/bottom) – An extra insulated jacket/sweater and pants that go over your mid-layer in cooler conditions.
Rain Gear (top/bottom) – A good quality waterproof set of a jacket and pants is a must to take along. Even if there’s no rain in the forecast.
Cold-Weather Gear – For shoulder season backpacking or trips where you’ll be gaining significant elevation, you may want to add an additional layer of insulated clothing as well as a toque and mitts.
Hat – Something with a brim for sun protection or insulation for cold weather is recommended.
Bandana/Buff – These can come in handy as sun protection, a sweat rag, washcloth, and wound protection in a pinch. Take a couple.
Sunglasses – Pretty self-explanatory, protect those peepers from the sun! My only advice would be to take a pair you don’t mind losing, sitting on, breaking, or accidentally dropping off the side of a cliff.
Boots/Shoes – I’ve seen people backpack in everything from sandals to army boots. Remember that the pack’s extra weight adds stress to the feet, so you may want to upgrade from what you’d typically day hike in. Ankle support is essential for some people and not an issue for others. Find an outfitter with good customer service and try on as many pairs as you possibly can before you buy. Mark and I both switched to Oboz Bridgers last year, and we’re in love with them.
Camp Shoes – Taking off your hiking boots at the end of a long day is one of life’s greatest pleasures, and you’ll appreciate having a spare set of shoes or sandals to slip on. I prefer sandals, which can double as a quick-dry stream crossing shoe as well. Crocs are another popular camp shoe option. Choose something that you can pair with socks in case it’s chilly in the evenings. Don’t worry, there are no fashion rules in the backcountry.
Gaiters – If you’ll be hiking in mud, muck, or thick bush, then a pair of gaiters will help keep your feet dry and the greeblies out of your boots.
NAVIGATION AND SAFETY GEAR FOR BACKPACKING
Perhaps the most critical category. Even if you’re planning to stick to a well-marked trail, travelling with others who “know where they’re going,” or think safety and navigation isn’t a big deal because you’re doing an “easy” route, it is still super important that you go prepared. It’s all too easy to take a wrong turn, misstep and sprain an ankle, or even slip and cut yourself while making dinner.
Being in the backcountry means being self-reliant, at least until you can get yourself to help. Which could be days in some situations. Familiarize yourself ahead of time with your route, your maps, and what is in your first aid kit. Don’t forget to take inventory and restock before each trip. If you’d like to take it up a notch, courses such as wilderness first aid and bushcraft or survival skills can improve your skills for when the unexpected happens.
Map – Carrying a paper map is always a good idea. Relying on your phone or GPS can be fine in most cases but don’t be left without a backup in the case of a glitch, dead battery, or broken device. Find the best quality topographic map you can get your hands on. Check with local outfitters, the park or trail management org, or online. Backroad Mapbooks has excellent resources for Canadian destinations.
Compass – A compass is another must for your navigation kit. Learn at least the basics on how to use it before you head out.
Route Guide/Guidebook – Many trails will have guidebooks or trail descriptions to help you navigate the trail. They will take up extra space in your bag, but it can be worth it. We carried The Sunshine Coast Trail book with us when we did the Saltery Bay Loop, and I found myself referencing the guide often. If there is one available for your route, I’d highly recommend taking it along.
GPS – There are a ton of options for handheld GPS systems for hikers. They are pricey, though, and we don’t generally carry one. Another option is using your phone but remember that you’ll often have to download your map ahead of time if you’ll be out of the service area during your trip.
PLB (Personal Locator Beacon) or Satellite Messenger – These devices allow you to send for help in an emergency situation. A PLB will send an SOS signal and your location to a rescue agency when activated. A satellite messenger can send the SOS signal and allows for non-emergent messaging and GPS navigation (depending on the model, features vary). Satellite messengers require a paid subscription to work. If you’re thinking about investing in a GPS system, it may be worth considering a satellite messenger that offers that feature and get both in one. REI has a great guide on choosing a PLB or satellite messenger.
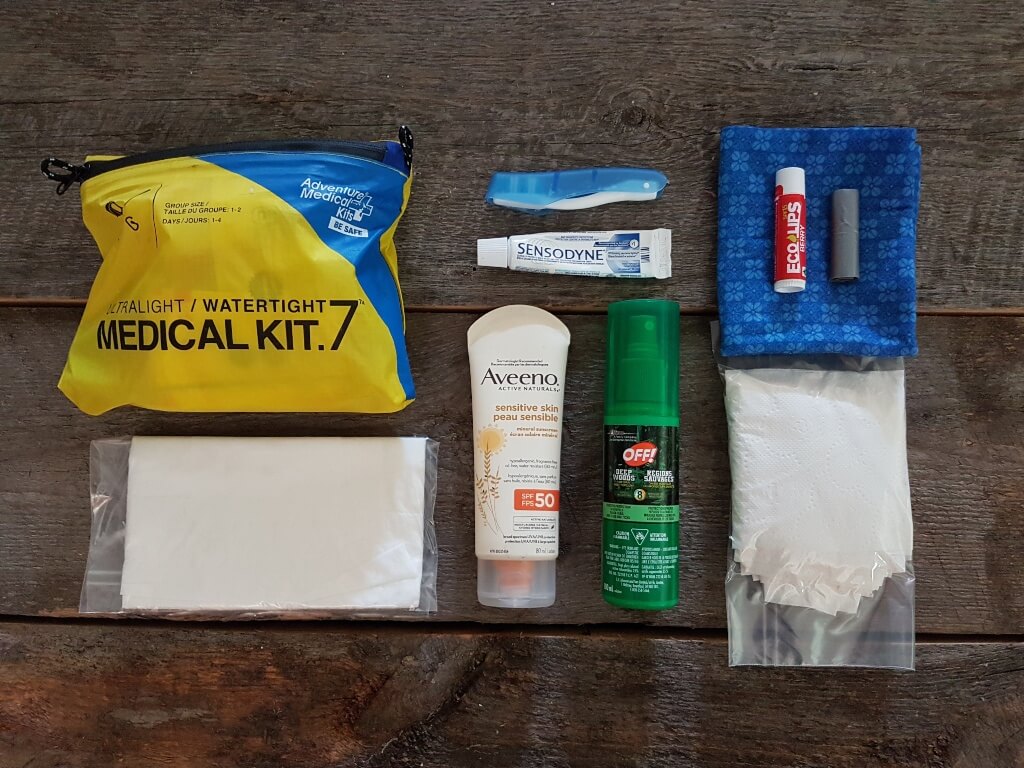
First Aid Kit – First aid kits can be DIY’d or bought pre-made. If purchasing a pre-made kit, be sure to open it up, see what’s in it, and get familiar with it. Add things you might want that aren’t included. MyMedic and Adventure Medical Kits are two great sources for pre-made kits. Or check out my guide if you’d like to DIY or if you’re taking inventory before a trip to see what you need to replace.
Survival Kit – In addition to your first aid kit, you’ll want a few extra survival items. The basics include a lighter/matches and fire starter, a signalling device (like a mirror, whistle, or horn), and an emergency blanket.
Repair Kit – For fixing your gear when things go wrong. Duct tape is an excellent general item to take that can work for repairs and first aid treatment. You’ll also want gear-specific items like a patch kit for your inflatable mattress or a pole repair sleeve for your tent.
Knife/Multitool – A multitool will have endless uses in the backcountry, from gear repair to first aid. Most multitools will have a knife included but are often small, and some prefer to carry a second knife along for bigger jobs. We generally take a Sog multitool, a small Swiss Army knife, and an additional knife when we backpack.
Wildlife Deterrent – Depending on the area, you may want or need to have along something to scare away potentially dangerous wildlife. Noisemakers such as air horns and bear bangers may be appropriate, but most trails will have rules on what is and is not allowed. For example, bear bangers are banned in many national parks in Canada. Bear spray should be carried in areas where necessary, and you should know how to use it.
Lightweight Tarp – A tarp can serve as an emergency shelter in a pinch or offer extra protection for your primary shelter in a storm. They can also be used to create a sheltered area for cooking in bad weather or act as a signalling device if it’s a bright enough colour.
READ MORE: MY DIY FIRST AID KIT FOR OUTDOOR ADVENTURES
BACKCOUNTRY HYGIENE ESSENTIALS
Being able to freshen up not only feels great after a long day on the trail but can also help keep you safer. Contaminated hands can easily be responsible for gastrointestinal upset in the backcountry. It’s important to have an easy way to clean up after going to the bathroom and before handling food. Keeping yourself clean and comfortable can also improve your mood and overall experience. Check out the section on LNT for more on responsible hygiene practices.
Toothbrush/Toothpaste – I know of people who like to cut the handle on a regular-sized toothbrush to make a “mini” version that packs easily. I use a collapsible travel toothbrush which is lightweight and works great. Travel-sized toothpaste tubes are handy for packing, or try toothpaste tabs for another packable option.
Sh*t Kit – When you gotta go, you gotta go. And you’ll appreciate having everything you need in one easy-to-grab bag when nature calls. A trowel, toilet paper or wipes, hand sanitizer, and a resealable disposal bag all packed into a dry bag will make a complete sh*t kit. You can find lightweight, foldable trowels for backpacking, but a run-of-the-mill garden trowel can work just as good.
Pee Cloth/FUD – As long as women have been backpacking, we’ve been trying to figure out how to make peeing in the backcountry less of a PITA. Everyone seems to have their own method. Drip dry, dab dry, disposable wipes, leaves, learning how to pee standing up (or doing it with a female urination device)… the options are endless. I’m partial to a pee cloth. This is basically a piece of fabric used to wipe after number 1, allowed to dry, and reused for the duration of the trip. Many use a simple bandana or rag from home. Sound icky? Try a Kula Cloth, which has an absorbent, antibacterial layer on one side, a waterproof layer on the other, and a snap to keep the “dirty” side closed up. It Easily snaps to the outside of your pack, making it accessible. I love mine. I know of plenty of others who prefer using a FUD. There are many styles, so try a few out and practice at home to see what works for you.
Pads, Tampons, Cup + Disposal Bag – Having your period need not mean you miss out on the backpacking trip. Just make sure to pack your preferred product and a resealable bag to dispose of any pads or tampons.
Wipes – Disposable wipes are super handy for the backcountry. They can quickly clean hands before a trail-side snack or provide extra cleaning power after going to the bathroom or when you have your period. I like to use them to “shower” at the end of the day. Just remember to pack them out.
Towel/Cloth – A small packable towel and/or a face cloth are great to have if you plan on doing more in-depth cleanups or if you’ll be washing your hair. They are also handy for after a swim or to dry off if you get caught in the rain.
Biodegradable Soap – Go multi-functional and use the same soap as you do for dirty dishes in your camp kitchen.
Deodorant – Some backpackers choose to forego pit stick and go au naturel, especially when trying not to attract wildlife. Others wouldn’t go without it.
Sunscreen/Lip Balm – Sun protection is critical when you’re out on the trail and exposed to the elements for long stretches at a time. Pack enough to get you through the trip, and don’t forget an SPF lip balm.
Bug Spray – Depending on the time of year and location of your trip, this may be more or less important. Check what types of bugs are a potential issue (mosquitoes, black flies, ticks, etc.) and find a spray that will work for that situation.
DOCUMENTS AND OTHER IMPORTANT ITEMS
There are a few important items and documents that you may want or need to have along with you. These might be things you need before, during, or after your trip and are sometimes easy to forget in the chaos of packing.
Permits – The need for a permit will depend on the requirements of the trail. Check well ahead of time if this is necessary as some permits are limited and need to be applied for early. You’ll likely need to carry the permit with you on your trip if one is required.
ID – It’s a good idea to carry your ID with you. You’ll want to have it on you if something happens, and, in some cases, you may need it to pick up a permit or cross a border. For example, we had to carry our passports when we hiked the Chilkoot Trail as it crosses the Canada/U.S. border.
Credit Card and/or Cash – You won’t need this in the backcountry, but having a credit card or cash might be necessary after your trip. You may need to pay a shuttle driver or pick-up essential items before you get back to your vehicle/home/hotel/etc.
Keys – Again, not necessary in the backcountry, but it’s safer to have them along with you than leaving them hidden around/in your vehicle at the trailhead.
Emergency Contact Info – Keep both the info for anyone you’d like contacted if something happens to you AND the numbers and info for whom you should contact in case of an emergency. This may be a local search and rescue organization or a general emergency number like 911.
Trip Plan – A trip plan will detail your planned route, dates, campsites, who is in your group, when you plan to be back, and who to contact if you don’t return on time. You can add additional details such as a description of your pack, tent, and clothing to make it easier to identify and locate you. You want to leave a copy back home with someone you trust and under the seat of your car if you’re leaving it at the trailhead.
Cellphone – Even if you don’t have service on the trail, your phone can be handy for phone calls and texts before/after your trip, to use for downloaded maps, or just as a small lightweight camera. Pro tip: if you’re using your phone as a camera, put it in airplane mode to conserve battery power.
Power – If you are taking a phone, GPS, rechargeable headlamp or anything else that requires power, you’ll want to take a battery bank(s), extra batteries, charge cords, and maybe even a small solar panel to top up your supply.

THE EXTRAS
The following items are by no means essential but may be things you’d like to consider carrying along depending on your interests and hobbies. Unless you’re planning to hike incredibly long daily distances, backpacking can provide ample downtime to enjoy your favourite activities out in nature. So, commit a little space and weight for items that will enrich your backcountry experience.
Journal + Pen/Pencil – Jot down notes from the day like distance, weather, and what wildlife you saw. Or wax poetic about your adventures and misadventures on the trail. Journaling can be a great way to process your experience. Plus, looking back over your entries afterward can help you assess and improve your planning, packing, and backcountry practices for next time.
Book – Yes, at the risk of making the ultra-lighters shudder, I will admit I’ve packed a novel or two on my backpacking trips. And yes, books can add a significant amount of weight and take up a lot of room in your bag, so I would suggest avoiding the 800-page epic and opt for something more compact. E-readers are another option that can help lighten the load a bit.
Deck of Cards – Cards can be a great way to pass the time while you’re waiting for your food to rehydrate or when you’re passing rainy hours cooped up in a tent.
Camera – I use my phone as my camera, but those more photographically inclined may appreciate having their favourite model along. I’ve heard wonderful things about Peak Design’s camera clip for keeping it handy while you’re on the trail.
Packable Day Pack – If you are setting up a backcountry base camp and day-hiking out from there, consider packing a small day pack just big enough to fit your 10 essentials. This will allow you to leave your bigger, heavier pack at camp and move a little lighter and faster for your side trips. I have one which packs down into its own stuff sack, weighs 10oz, and is even waterproof.
Etc. – whatever you’re into – this might be binoculars and a bird guide, a travel-sized paint set, a sketch pad, a plant ID guide… the options are endless.
Phew! That was a lot!
If you’re just starting out and feeling overwhelmed at the thought of buying up an entire backpacking kit, keep in mind that you don’t necessarily need the “best” gear to get out there. Start with what you’ve got, invest in quality items for the important stuff (i.e. safety gear), and keep it simple. Borrow equipment from friends, shop sales, buy used, or rent from local outfitters. Above all, the most critical aspect of gear gathering and prep is testing everything before you go. Get familiar with it, know how to use it, and make sure it’s in good working order.
GETTING YOURSELF READY FOR THE TRAIL
The next step of prepping for your first trip is getting your body, mind, and gear ready to go. This stage may involve starting a workout routine, taking a course to brush up on old skills or learn new ones, and making sure your gear is trail-ready.
PREP YOUR BODY FOR BACKPACKING
How you go about getting yourself physically ready for the trail will depend on many factors such as your current physical condition and abilities, the difficulty of the route, and the amount of weight you’ll be carrying. Also, I’m not a personal trainer. For those reasons, I won’t be sharing a one-size-fits-all workout routine. Instead, I’ll share some of my insights and advice from lessons I’ve learned over the years.
You don’t need to be superhero-level fit to backpack. There seems to be a misconception out there that you need to be this uber-ripped god(des) to enjoy the outdoors, but that’s so not true. Fit the trail to your abilities and spend a few weeks (or months!) before your trip working on increasing your strength and endurance.
Training will make the trail more enjoyable. I’ve done plenty of multi-day adventures without doing much of anything in terms of body prep. It is possible, but I will say that it is much more fun when your calves aren’t screaming at you within the first 7 minutes.
It’s not all about the legs. Backpacking is a full-body activity. Any strength training routines should include upper body and core in addition to all those squats and lunges. Also, train for the downhills. You (and your knees) will thank me later.
Wear your pack to train. Throw some weights in it and get on the treadmill. Or, if it’s an option for you, do a few day hikes with a fully loaded pack on.
Don’t forget the cardio. Improving your cardio-respiratory function makes your body more efficient in getting blood and oxygen to your working muscles. Which means more time on the move and less time stopping to give your pounding heart and burning lungs a break.
PREP YOUR MIND FOR BACKPACKING
Backpacking can at times be just as much of a mental game as it is a physical one. This is a fact that many people seem to overlook. Taking some time to mentally prepare yourself can do wonders for the quality of your time on the trail.
Increase your confidence. If you’re feeling nervous about your trip, many things can help calm your nerves and increase your confidence level. Take a minute to try and figure out what exactly it is that you’re worried about. Maybe you’re concerned about wildlife, getting lost, or not being physically able to do the hike. Then make a plan to address your concern. Learn all you can about the wildlife in the area and what you can do to prevent an encounter. Take a navigation course. Start working with a personal trainer to increase your stamina. You get the idea.
Stay organized. Feeling scatterbrained and chaotic before heading out on a trip can do a lot to derail the experience. Keep your notes and information organized as you plan. Practice packing your gear, so you know that you have everything and where it is. Make a trip plan. You should be making a trip plan anyway to give to a person you trust, but it is also a great way to center yourself and ensure you have all your ducks in a row.
Prepare yourself for the sh*tty parts. Backpacking can be full of amazing moments, and, in my totally biased opinion, I think these far outweigh the downsides. But there are going to be not-so-amazing moments too. If you’re heading into the trip thinking it will be nothing but sunshine and rainbows, it’s going to make the tough times that much harder to take. You don’t need to be a Debbie downer, but be realistic. Know that there will be things that test your patience and make you question why you’re out there. You might lose the trail and have to backtrack, have a disagreement with other group members, struggle physically, or be stuck in the rain for three days. It’s all part of the experience.
Remember that overcoming challenges on the trail can be part of what makes backcountry adventures meaningful and memorable. Some of my favourite stories come from our hardest times, and a lot of personal growth happens when you’re pushed to your limit. Also, many of my worst trail moments could have been avoided with a little more forethought and planning – which is why I’m writing this guide. Learn from my mistakes, people!
PREP YOUR GEAR FOR BACKPACKING
Break in your boots. Even if the company that makes them claims they don’t need to be broken in, do it anyway.
Test your gear. Run your stove. Set up and take down your tent. Blow up your sleeping pad. Check your lighter. Test your headlamp. Inventory your first aid kit. Look for rips and tears in your clothing and gear. Check your pack for broken clips and ripped straps.
Do a trial run. This can be done as a short overnighter at a spot close to home or in your own backyard. Pack your bag, wear it for a while, unpack your bag, and set up camp. Do you have everything you need? Was it easy to find/use? Was your pack comfortable? Do you need to rearrange things, or did you feel organized? Did you need to run into the house or call someone to bring you something? A lot of the fine-tuning will come with a little time and a lot of trial and error, but doing a quick run-through before you’re deep in the backcountry can reveal what’s going to work and what isn’t. See below for more tips on packing your bag.
EXECUTING THE BACKPACKING TRIP
You’ve planned, you’ve prepped, now it’s time to get out there! This section will cover tips and tricks for things like packing your bag, staying safe on the trail, and how to be an efficient backpacker. There is also advice on trail etiquette and leave no trace principles that will help you navigate the unwritten (and sometimes actually written) rules of the backcountry.
HOW TO PACK FOR A BACKPACKING TRIP
I have an intense love/hate relationship with packing. On the one hand, it signals a new adventure and all the excitement and anticipation that comes along with it. On the other, packing just sucks. Everyone hates it. While I won’t promise to make packing easy or enjoyable, I will say that my tips below will help lessen the chaos, the forgotten items, and the general overwhelm of packing for a backpacking trip.
Start a pack pile early. Then purge it. Instead of waiting until the 11th hour, start gathering your gear ahead of time. Designate a spare bedroom or whatever space is convenient for you and start piling. Whenever you think of something or come across an item you think you want to take, toss it in there. Don’t worry about keeping it organized or even rational. Just get it all in one spot for now. Once you’re closer to your departure day, you can start organizing your items into categories and double-checking that you have everything you need. In addition to making sure you don’t forget anything, pack piles also give you the chance to purge unnecessary items that seem like a good idea when you throw them in there. Same-day packing doesn’t allow quite the same time for reflection, and you’re more likely to stuff nonessentials (and all the extra weight that comes with them) in your bag. No, you don’t need seven pairs of leggings for a 3-day trip.
Use a list. Whether you’ve made your own list or are using one you printed off the internet, make sure you have something to reference. As you can see from my incredibly long gear list above, there are a lot of items to take on a backpacking trip, and it’s so easy to forget things. Being able to track and check off items as you pack them is invaluable.
Pack in “kits.” Keeping an organized pack will make your trail life infinitely easier. I already mentioned my sh*t kit, which keeps all my bathroom necessities in one easy-to-grab place. But you can do this with your cooking gear, water purification items, hygiene supplies, etc. Packing this way keeps all the things you need for a specific task in one spot, which means instead of digging through to the bottom of your bag to find a spoon, you just grab your kitchen kit and start cooking. I use dry bags to hold these kits, which I discuss in my next point…
Use dry bags. For everything. Waterproofing your gear is so important. Whether you get caught in a downpour or take a tumble during a stream crossing, it’s all too easy for your gear to get soaked. Using a rain cover for your pack or lining it with a garbage bag are some ways to waterproof your bag. But I prefer to just pack everything in dry bags. This helps keep me more organized AND keeps all my gear dry. Using dry bags also helps when you have to pack wet items and want to isolate them from the rest of your gear. I have dry bags designated for food, clothing, my sleeping bag, tent body, my sh*t kit, my first aid kit/toiletries/fire starting supplies, and important docs/papers/books/etc.
All the smells in one place. Speaking of those dry bags, designate one for your smelly stuff. Food, sunscreen, lip gloss, cooking pots, etc. Anything with a scent. This bag can then easily be tossed in a bear locker or cached safely away from your sleeping area. I always leave a bit of extra room in my food bag to throw in my toiletries kit and any other smelly items I may have along.
Use some common sense. Put things where they make the most sense for you. If you’re someone who reapplies sunscreen or lip gloss every 15 minutes, pack those in your hip belt pockets. If you don’t use those items as much, keep them stashed in your toiletries kit. If you like to eat on the go, throw an energy bar in those hip belt pockets too. Some other common-sense advice: bear spray is no good to you if it’s buried in the bottom of your bag. Keep it in a side pocket or holster for easy access. Keep your rain gear where you can quickly grab it when the clouds open up. No one wants to unpack their entire bag on the side of the trail in the rain. This article will help you determine the best spots for most items regarding weight distribution and usage patterns.
A place for everything and everything in its place. Nothing kindles my anxiety quite like watching someone pack and unpack a bag for the third time that day because they just can’t find that one thing they’re looking for. Once you’ve decided where something goes, put it back there EVERY TIME. This will not only save you the time and stress of having to rifle through a messy bag, but it will also help prevent you from leaving things behind. Once you have a system for where things go, the ‘flow’ that comes with every pit stop, campsite break down, and trail-side meal is nothing short of delightful.
STAYING SAFE AND COMFORTABLE ON A BACKPACKING TRIP
Backpacking brings with it a few inherent risks, as well as the potential to find yourself in some uncomfortable situations. Below, you’ll find some of the more common areas of concern for backpackers and ways to help prevent and deal with unpleasant situations.
Wildlife. Whether you’re in the desert or the mountains, every ecosystem brings with it a variety of wildlife, from creepy crawlies to large predators. Before heading out, familiarize yourself with what types of wildlife live in the area, what risks they may pose, and best practices for avoiding an encounter. As a very general rule of thumb, if you make a little noise, avoid sneaking up on or invading the space of animals, keep your campsite clean and food cached adequately, and just generally respect the fact that you’re in their home, you won’t have too much of a problem. Use netted clothing and/or bug spray to keep the mosquitoes and ticks at bay. Keep your bear spray somewhere you can easily reach it at all times.
Other hikers. I’m often asked if I’m concerned about coming across a dangerous person while in the backcountry. I believe pop culture has created this image that the woods are teeming with serial killers on a mission to seek out their next victim. While attacks do happen in the backcountry, they are far less likely than having the same thing occur in an urban area. Following the same precautions as one would do anywhere – being aware of your surroundings, letting someone know where you’ll be, etc. – are good practices. If you’re really concerned, consider taking a self-defence course.
Weather. The exposure that comes with backpacking means you are more vulnerable to weather events while you’re on the trail. Always check the forecast before you go while also keeping in mind that forecasts are often wrong. Know what types of storms or risks are common in the area. Is there potential for thunderstorms, flash flooding, heat waves, cold snaps, dangerous wind speeds, tornados, etc.? Have a plan for how you will deal with these if they happen to come up while you’re out there. Consider cancelling your trip if the forecast indicates a strong possibility of dangerous weather. Aside from the obvious threats of weather events, keep yourself comfortable in normal conditions by making sure you have what you need. Use UV protection and have plenty of water in hot and dry weather, and have high-quality rain gear and multiple layers to keep you dry and warm in wet and cold climates.
Illness and injury. Stomach bugs, rolled ankles, blisters, and cuts and scrapes are common on backpacking trips. Prevention is ideal. Follow safe food storage and preparation practices, sanitize your hands before you eat, and treat any water you consume. Use blister prevention patches on areas that are prone to them. Be careful and conscientious about your movements and activities to avoid things like slicing your finger with a knife or tripping over your tent’s guy lines. Make sure your first aid kit is well stocked with supplies and meds for those times that your best efforts at prevention fail.
Choosing a campsite. The wrong campsite location can result in a night that ranges from slightly uncomfortable to downright dangerous. Try to find a spot that is as flat and free from sharp stones and tree roots as possible. Avoid setting up anywhere that dead standing trees pose a risk of falling or dropping branches (aka widowmakers). Stay away from flood or tide areas. And maybe take a quick look around to find any signs that you’re setting up in an animal’s bedroom.
Like anything in life, backpacking brings with it risks. This doesn’t mean we should avoid doing it. It just means we need to be aware of the dangers and practice our risk assessment skills. Common sense, confidence, and taking time to gain the knowledge and skills that will help keep you comfortable and safe will go a long way in making the most of your backcountry experience.
TRAIL ETIQUETTE
As with most things, hiking and backpacking have unwritten ‘rules’ that govern behaviour on the trail. Once again, common sense is the name of the game, but the points below will give you a good overview of standard trail etiquette.
Uphill hikers have right of way. They’re generally working harder and will appreciate downhill hikers moving out of the way so they can capitalize on their momentum.
Hike on the right, pass on the left. Just like driving in North America. Keep to the right side of the trail when meeting an oncoming hiker. If you’re moving to pass someone, do it on the left. A polite “excuse me, may I pass?” will be welcomed. If you’re being passed, move over to the right side of the trail to let the passer get by you.
Solo hikers give way to large groups. Generally, it’s considered easier for a single hiker to move off the trail and allow a larger group to pass. Having said that…
Large groups be respectful of other trail users. If you’re in a group, hike in single file to the right side of the trail, allow faster groups and hikers to pass when needed, and just keep a general awareness of how you may be taking over the trail or infringing on other trial users’ experiences.
Mountain bikes yield to hikers, hikers yield to horses. If you’re hiking a multi-use trail, it’s handy to know this accepted right of way for various modes of transport.
Be friendly. A polite hello is all that’s necessary when meeting others on the trail. Some will be happy to stop and chat, while others will want to carry on. Sharing relevant and requested trail info is considered good manners, but offering unsolicited advice based on assumptions is not. IE: there is no need to comment on someone’s choice of footwear or ask a solo female hiker where her husband is.
Keep your noise to yourself. You may enjoy blasting tunes or catching up on podcast episodes while on the trail, but that doesn’t mean everyone else does. Use headphones if you want to listen while you hike. Groups should also be aware of their noise level. It’s great to chat or make a little noise to keep wildlife at bay, but there is a line between that and being obnoxious to other trail users.
Move off the trail when taking a break. Find a spot where you can safely and comfortably rest when you need a break where you won’t be blocking the path with your bag or feet.
Respect the rules and rule enforcers. Park rangers and park staff are out there doing their job. Be respectful if they stop to chat or ask to see your permit. Don’t climb barriers or break posted rules to get that perfect IG shot. The rules are there for a reason, and if they apply to everyone else, they apply to you too.
Share the space. Many trails have communal camping areas for backpackers. Some will have tent pads, communal fire pits, outhouses, picnic tables, and even warm-up shelters. Ensure everyone in camp feels welcome and has the room they need to cook, eat, hang out, and set up their site. Don’t let your group hijack the site to the point where others don’t feel comfortable.
Leave no trace. One of the best ways to be respectful of other trail users is to minimize your impact and clean up after yourself. The next section discusses LNT principles and how they can make for a more enjoyable trip for you and everyone else on the trail.


LEAVE NO TRACE
Leave no trace principles can help provide guidance for us backcountry users and help ensure we minimize our impact on the ecosystems in which we recreate. We want not only to leave the backcountry for the next person to enjoy, but we also want to make sure the habitats of the animals and plants who live there are still functioning as they should. We’re not looking to Bear Grylls our way through the backcountry. We’re looking to visit, enjoy, and interact with nature while not entirely taking it over for ourselves.
Remember that each trail or park will have their own regulations in regards to things like open fires, grey water disposal, etc. Familiarize yourself with these area-specific rules ahead of time. Below, I provide a quick overview of the LNT principles which provide general guidance and best practices in most situations. Some of the points may seem obvious, while others are things that could easily be overlooked. You can find more information at LNT.org.
Plan ahead and prepare. What this whole marathon of a post is all about. Taking the time to make a plan, become familiar with what you’re getting into, and preparing for those possibilities can go a long way in reducing our impact. Gather as much information as you possibly can about where you’re going, who you’re going with, and what might happen while you’re there. Prep and pack accordingly.
Travel and camp on durable surfaces. Repeated foot traffic and campsite creation compacts soil, kills off vegetation, and can do irreparable damage to an ecosystem. In high-use areas, hikers will want to hike and camp where others have before. Stay on the trail and pitch your tent in a designated site, or somewhere that the vegetation has already been impacted. For more remote trips, or in cases where you need to leave the trail (for a mid-hike bathroom break, for example), try to spread out your impact and avoid creating new pathways. If you have your choice of travelling or camping on different surfaces, choose rock, gravel, and sand over lush, vegetated areas. Keep bodily functions and campsites 60 metres (200 feet) from trails and water.
Dispose of waste properly. Pack out what you pack in. Food waste, packaging, used first aid supplies, etc., all need to go with you. Don’t try to burn them in a campfire, and don’t assume that apple core is fine to leave because it’s biodegradable (it may well be, but in the meantime, it will attract wildlife and create a stinking rotten mess for the next hiker to come upon).
Peeing, pooping, and having your period in the outdoors is always a challenge for new hikers. You generally want to pick a bathroom site that is 60 meters (200 feet) from water, campsites, and trails. Pee can go on the ground and can be diluted with water if you’d like. Number 2s should be buried in a cathole. Take that trowel from your sh*t kit and dig a hole about 15cm deep x 15cm wide (6″ x6″). If you have good aim, poop in the hole. If not, use your trowel to toss it in there after the fact. Toilet paper can be buried as well or packed out in a trash bag. Leaves, sticks, and stones can also serve as natural TP. Refill the cathole with the soil you dug out and make the area look as untouched as possible. In sensitive areas, you may be required to use a wag bag and pack out your poo. If you have your period while backpacking, the contents of a menstrual cup can be dumped in a cathole and buried. Pads and tampons need to be bagged and packed out.
You’ll also have to be responsible for your hygiene waste. If you need to clean up on the trail:
- Bathe away from water sources
- Grab some water, head 60 meters (200 feet) away from the water, campsites, and trails
- Sponge bath yourself with a bandana or small cloth
- Use a small amount of biodegradable soap
- Disperse the used water over a large area
An alternative is to use wet wipes for bathing. These should never be buried or left behind and need to be packed out.
The same general rules apply for brushing your teeth. Use only as much toothpaste as you need, brush, and then think sprinkler imitation to spread what you spit out over as big an area as you can.
Dirty dishwater should be strained, the food particles packed out in your trash bag, and the wastewater dispersed over a large area away from water sources, trails, and campsites.
Leave what you find. This one is pretty simple. If it’s in nature, it’s serving a function. Leave it there. It may not be a big deal for you to pick that pretty flower, but what if everyone who walked the trail that week did the same? Would there be enough of that species or plant left to fulfill its need for pollination, growth, seed production, and propagation? Chances are, you don’t have the intimate knowledge of the complex workings of the ecosystem to know that. So, take a break, enjoy its beauty, snap a pic, and move on.
Minimize campfire impacts. I love a campfire as much as the next person, but I’m a big advocate for minimizing the use of campfires in the backcountry. Or at least not relying on them. All too often, I’ve prepped for trips only to find out that a fire ban is put in place the day before we head out. Or, we get out there, and there is no good source of firewood. Always take a stove to use as your primary source of energy for cooking and boiling water.
In cases where you do determine it’s ok to have a fire, use existing fire rings if they are available. If not, build your fire where it is safe to do so and where it will have the least impact on the surrounding environment. Keep the fire small and feed it only with down and dead wood no larger than your wrist in diameter. Fires should be put out thoroughly with water and stirring. To return a previously undisturbed area to a more naturalized state, scatter the COMPLETELY COOLED ashes over a large area and return the site to as close to a pre-fire state as you can.
Respect wildlife. The goal is to have as little influence on their natural behaviour as possible. Approaching, feeding, startling, and touching wild animals can all have a detrimental impact on them. It changes their patterns and how they interact with humans. Quietly observe them from a respectful distance and do not stress them just to get that perfect picture. Feeding them, either intentionally or by leaving your trash behind, is a big no. These rules go not only for large mammals like bears, who often become aggressive and need to be destroyed once they start associating humans with a food source, but also for the cute little ones too. So, before you coax that adorable chipmunk over with a handful of nuts, consider the monster you may be creating.
Be considerate of others. This was covered in the Trail Etiquette section.
I’m the first to admit that we are far from perfect trail users. We’ve made poor decisions and broke many of the LNT principles, especially when we were new naïve backcountry babies. You’ll also likely come upon situations where it is difficult to apply the ‘rules’ of LNT due to circumstances. Think of them more as guidelines and do your best to make decisions that you can feel good about.
NOW GET OUT THERE
I realize the 12,000 words of advice and information I just threw at you could be a bit overwhelming. It might even make backpacking seem out of reach or too big of a task to take on. But, while I think it’s important to do your research and be prepared, I also want to encourage newbies to JUST DO IT. Pick a trail, pack a bag, and put one foot in front of the other. Trust your instincts and learn as you go. Everyone starts somewhere, and it’s always a great time to start.
Need more inspo? Check out some of my other posts from our backpacking adventures:
Backpacking to Lillian Lake
Backpacking the Saltery Bay Loop
Photo Essay from Kananaskis Country
Backpacking Solo
Hiking the Chilkoot Trail
It has taken me many years to develop but I make a 12oz. Wood burning cook stove with a baffle and grate. A open top kettle held up tight to the bottom broils my bacon. The stove hangs on a 12oz tapered chimney that can bear weight to serve as centre pole.
I pitch a tarp that is a better 4 season shelter than any tent. All sides tight to the ground in a blizzard or all sides raised to form an umbrella.